


This guide will walk you through how to brand your woodworking projects using our standard flame heated branding irons.
For irons up to 5CM in size, a simple butane blow torch will work perfectly for heating the iron to temperature. For larger sizes, we recommend using a propane torch for quick heating. Alternatively, a simple gas hob will work too.
Things needed:
- Brass branding iron (included in kit)
- Wooden handle (included in kit)
- Spring washer (included in kit)
- 13MM spanner/wrench
- Butane/propane torch, or other flame heat source
- Spray bottle filled with water
- Scrap wood for checking temperature
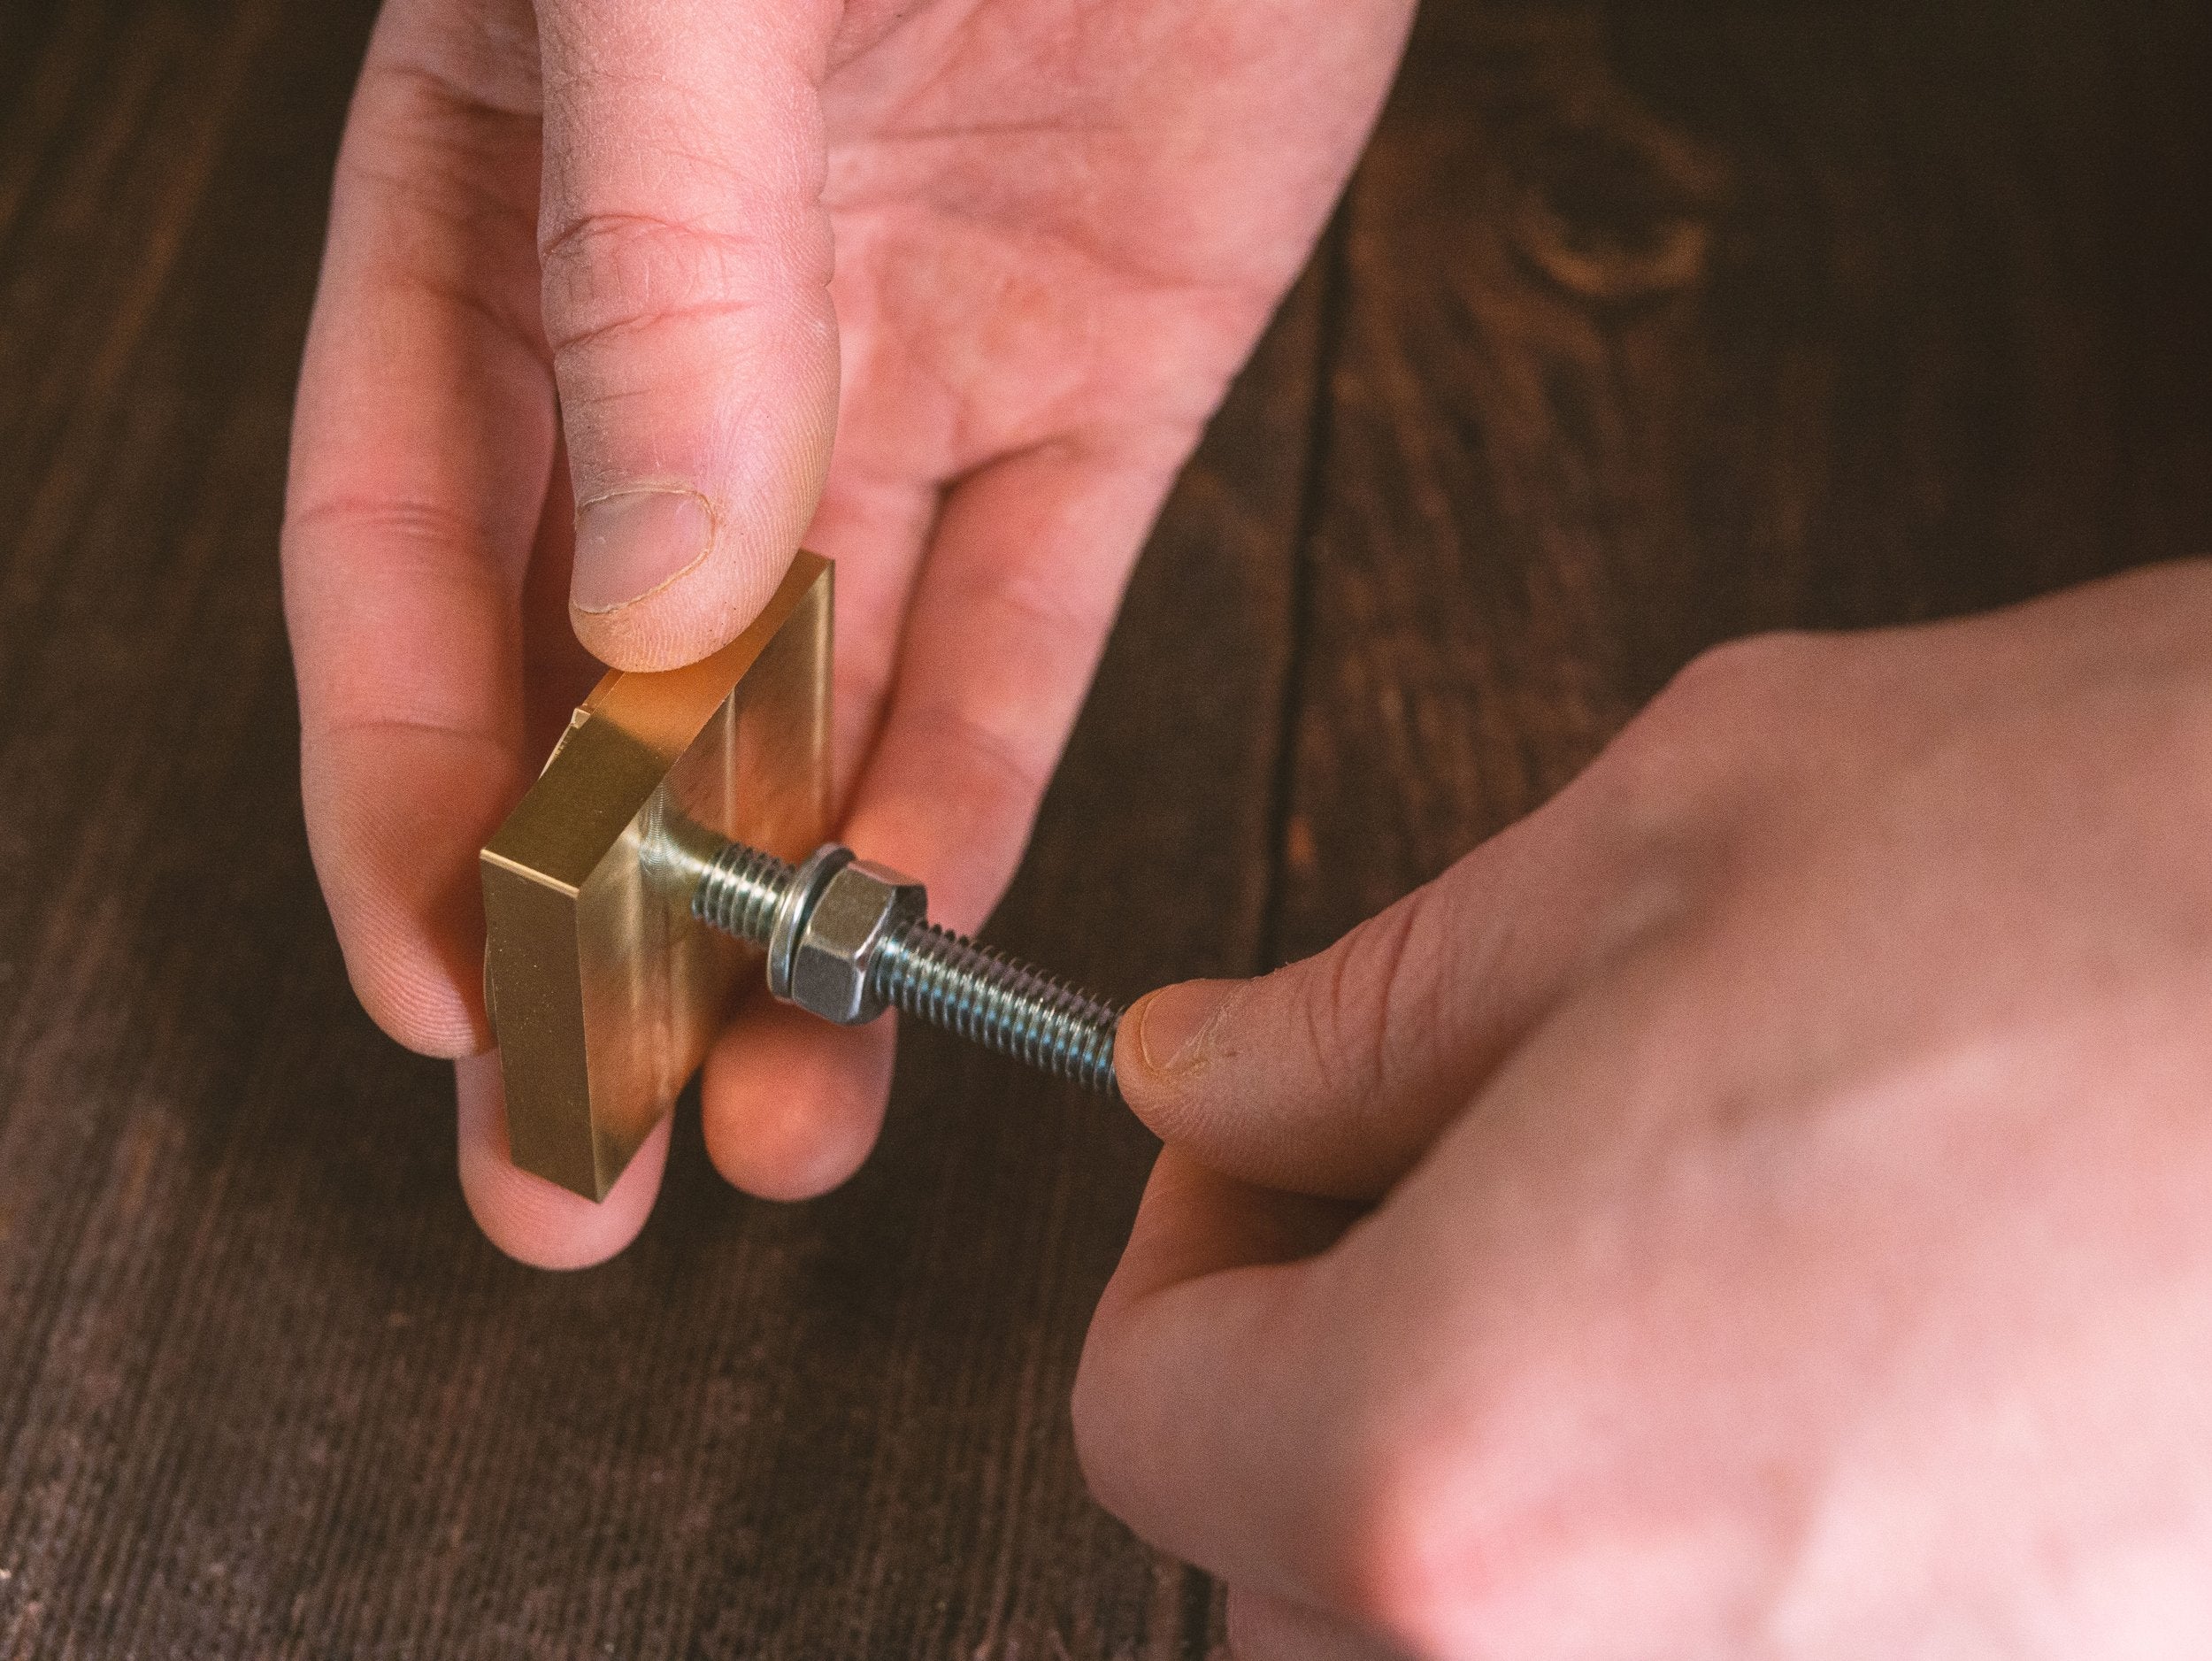
Start by screwing in the handle to the iron itself. Ensure the spring washer is between the nut and the iron. Please be careful not to overtighten.
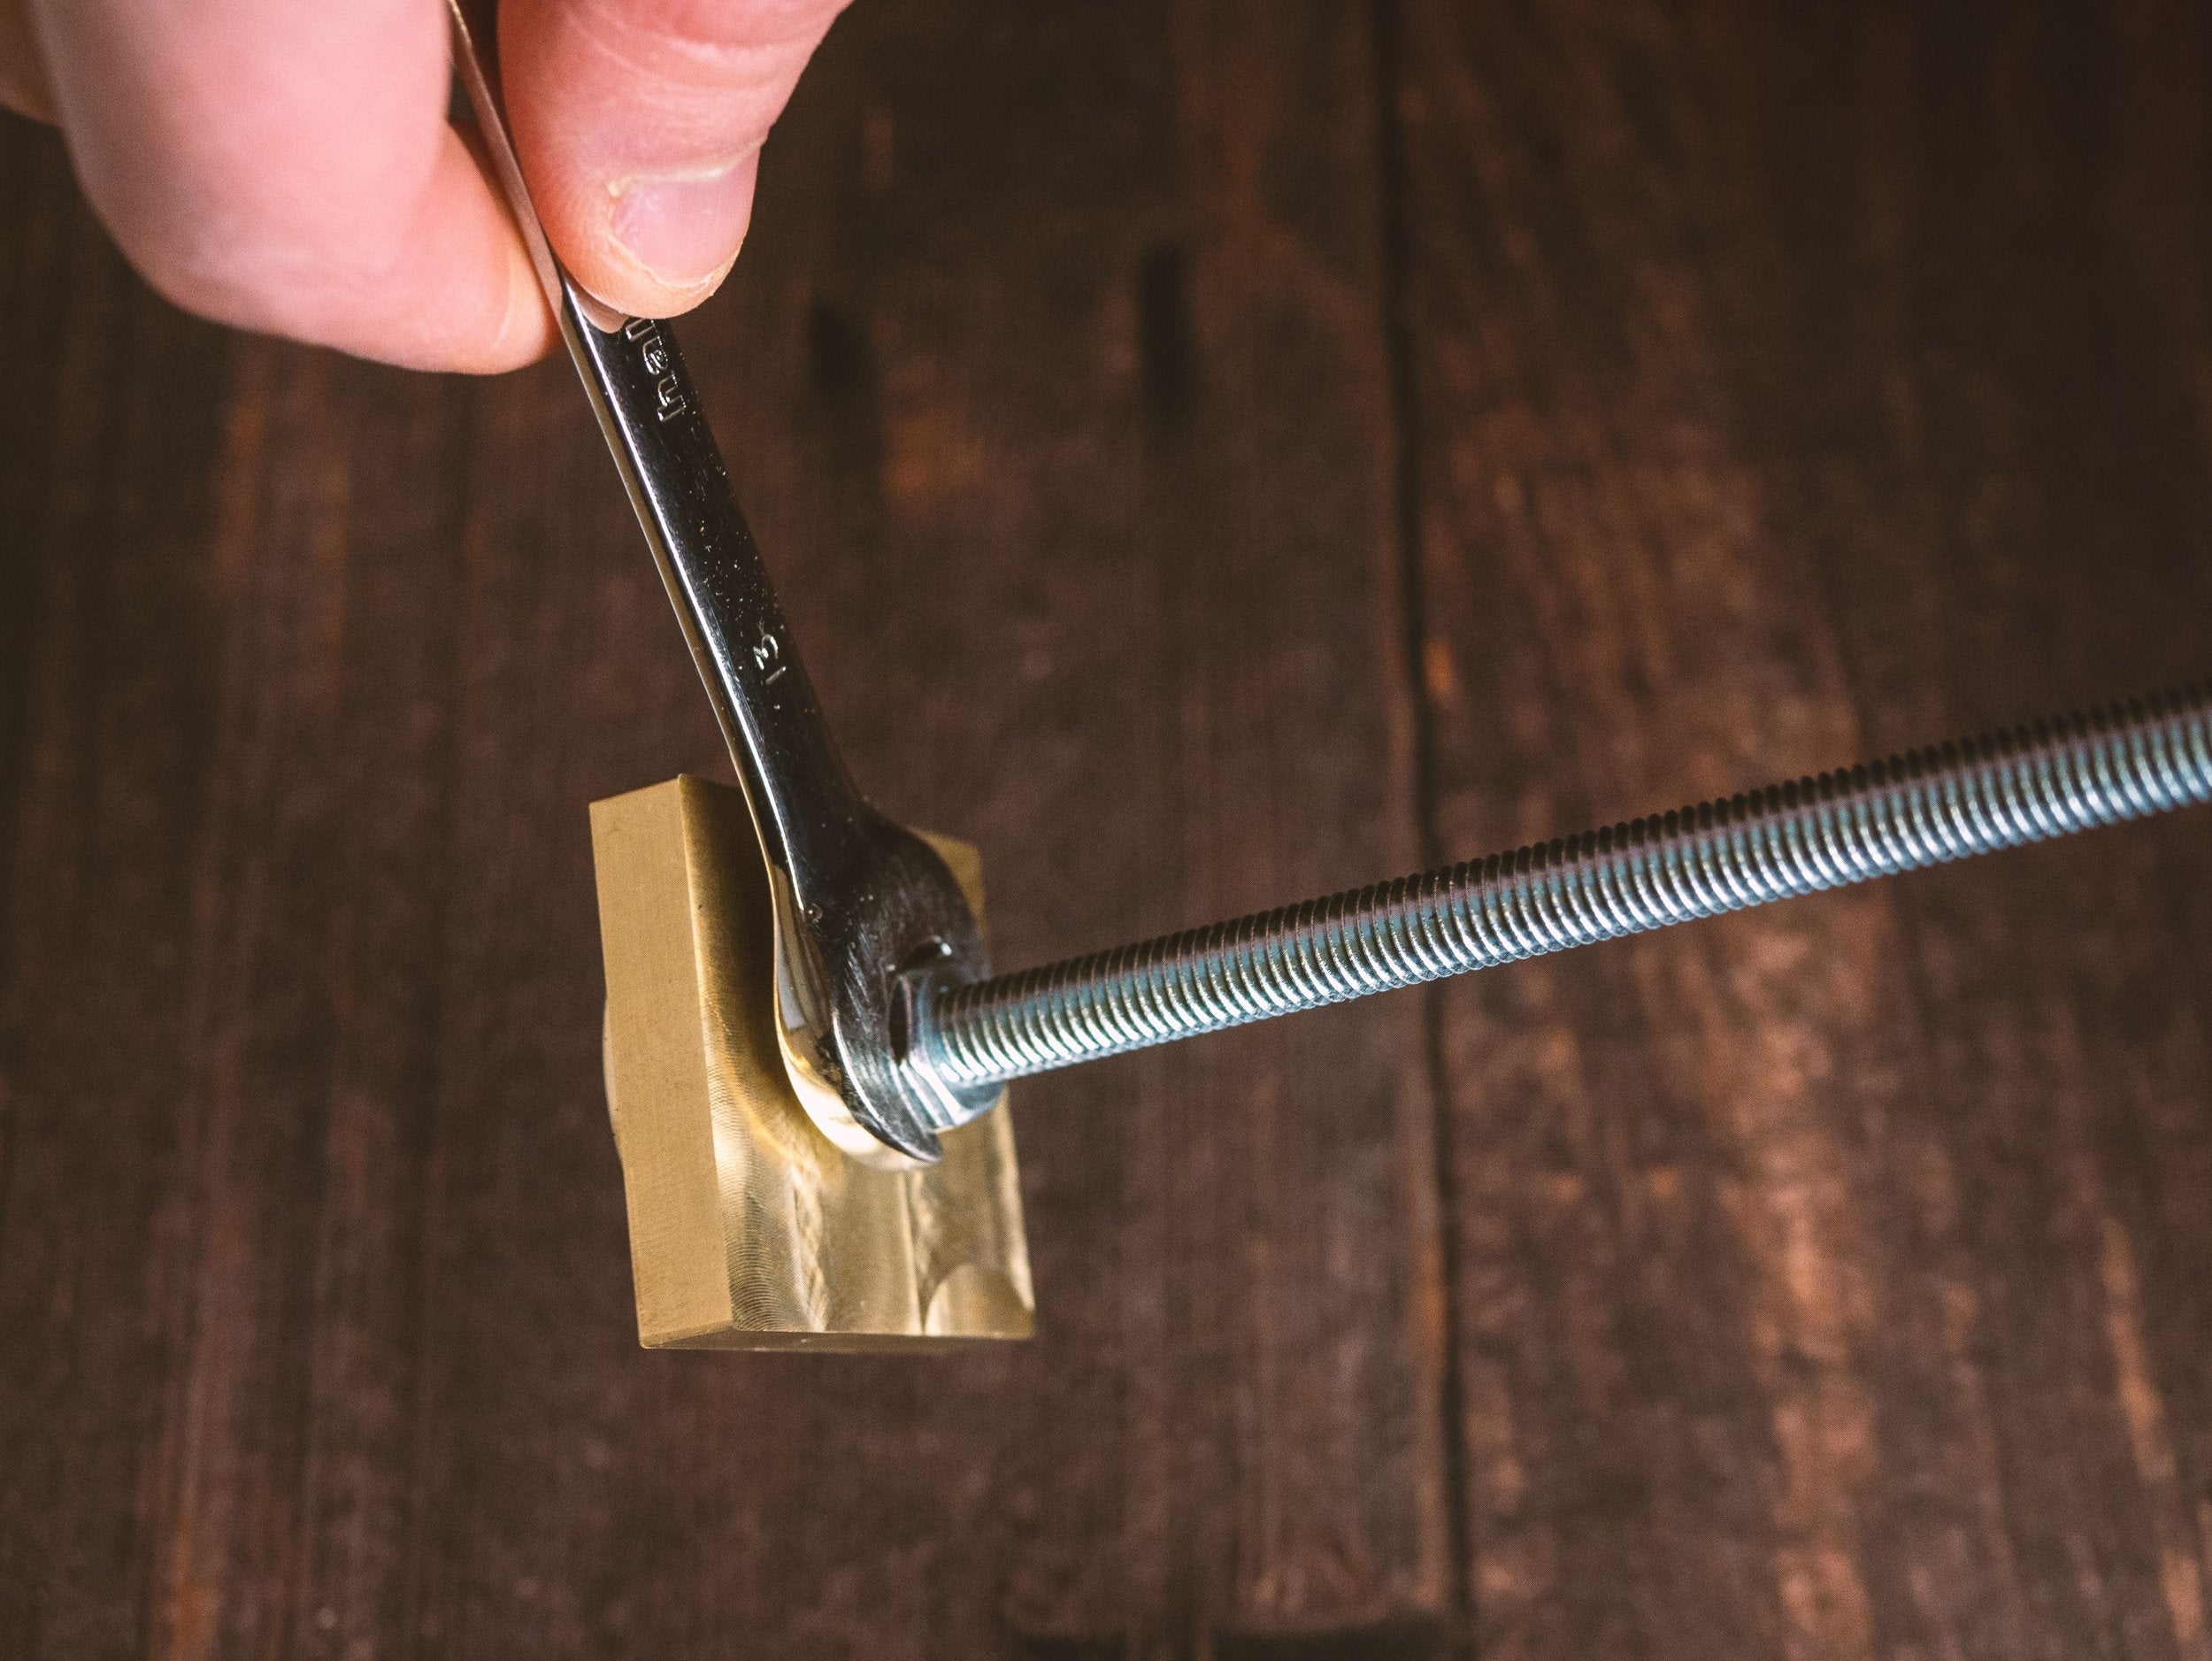
Tighten the nut against the spring washer until the spring washer is sitting flat. Please be careful not to overtighten this as only a small amount of torque is required.
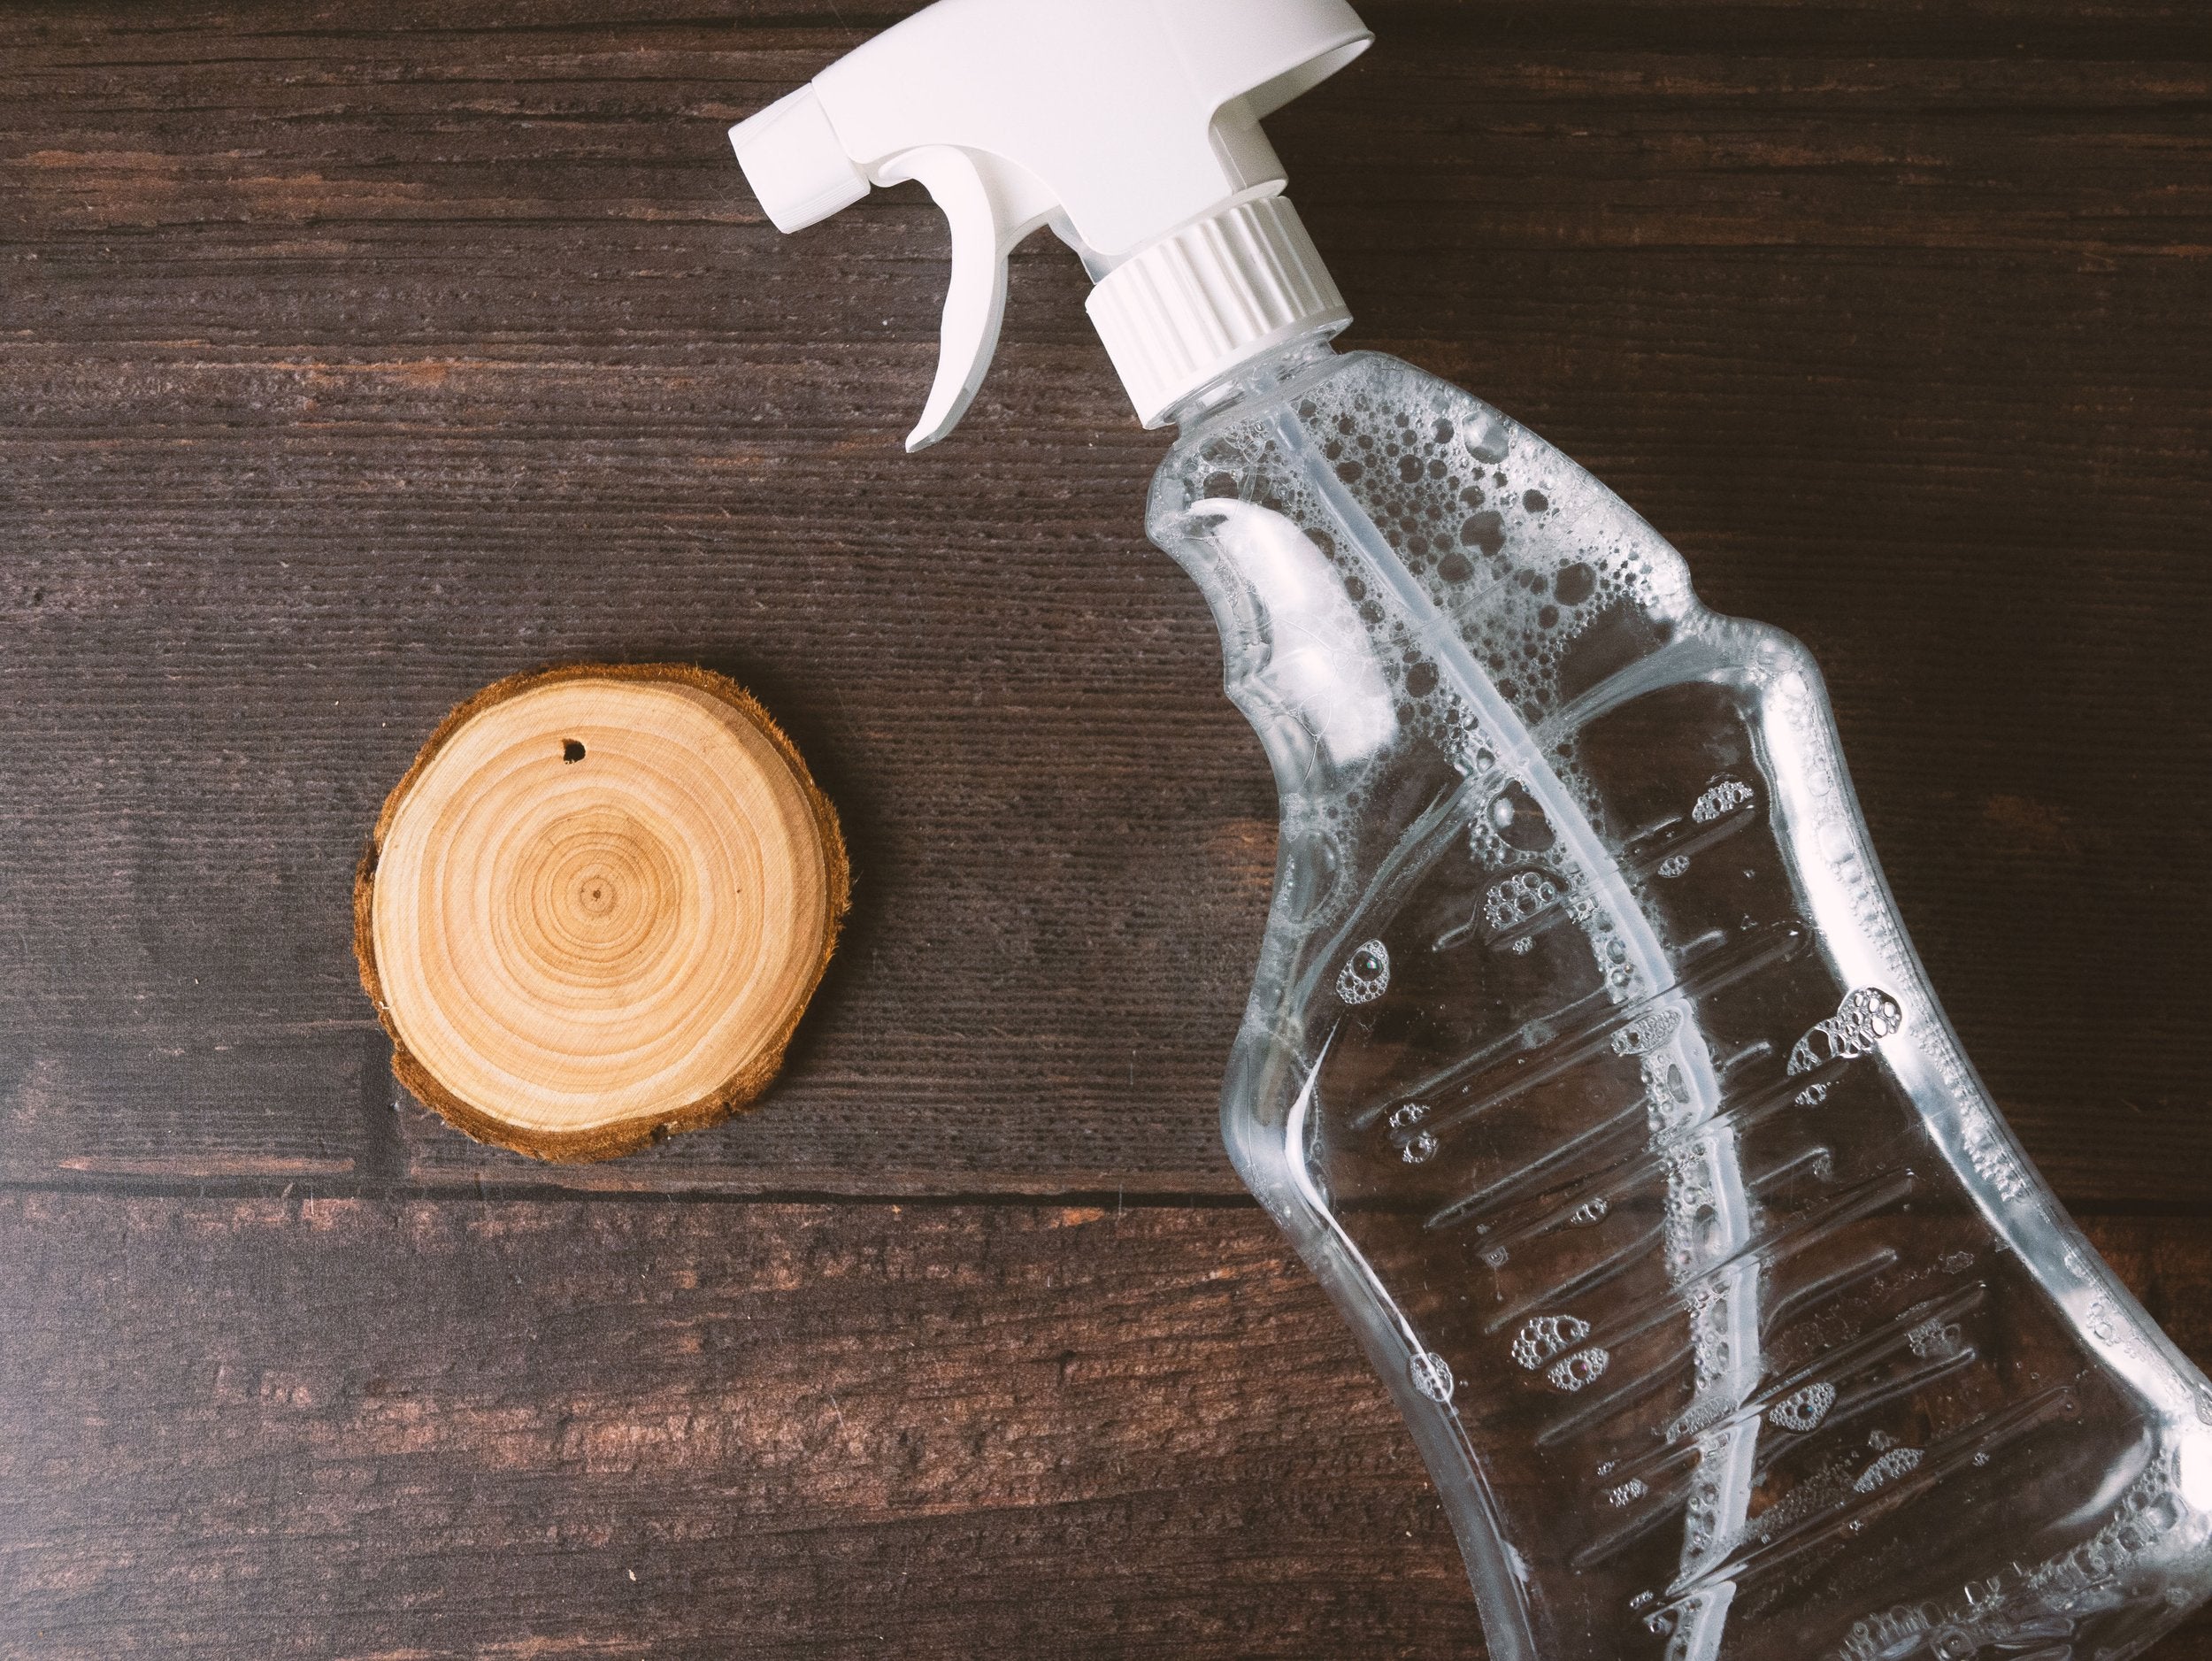
Spray water on the wood that you intend to brand. This will help manage the heat coming off your iron once applied and keep the areas that are meant to be unbranded clear, allowing the details to pop!
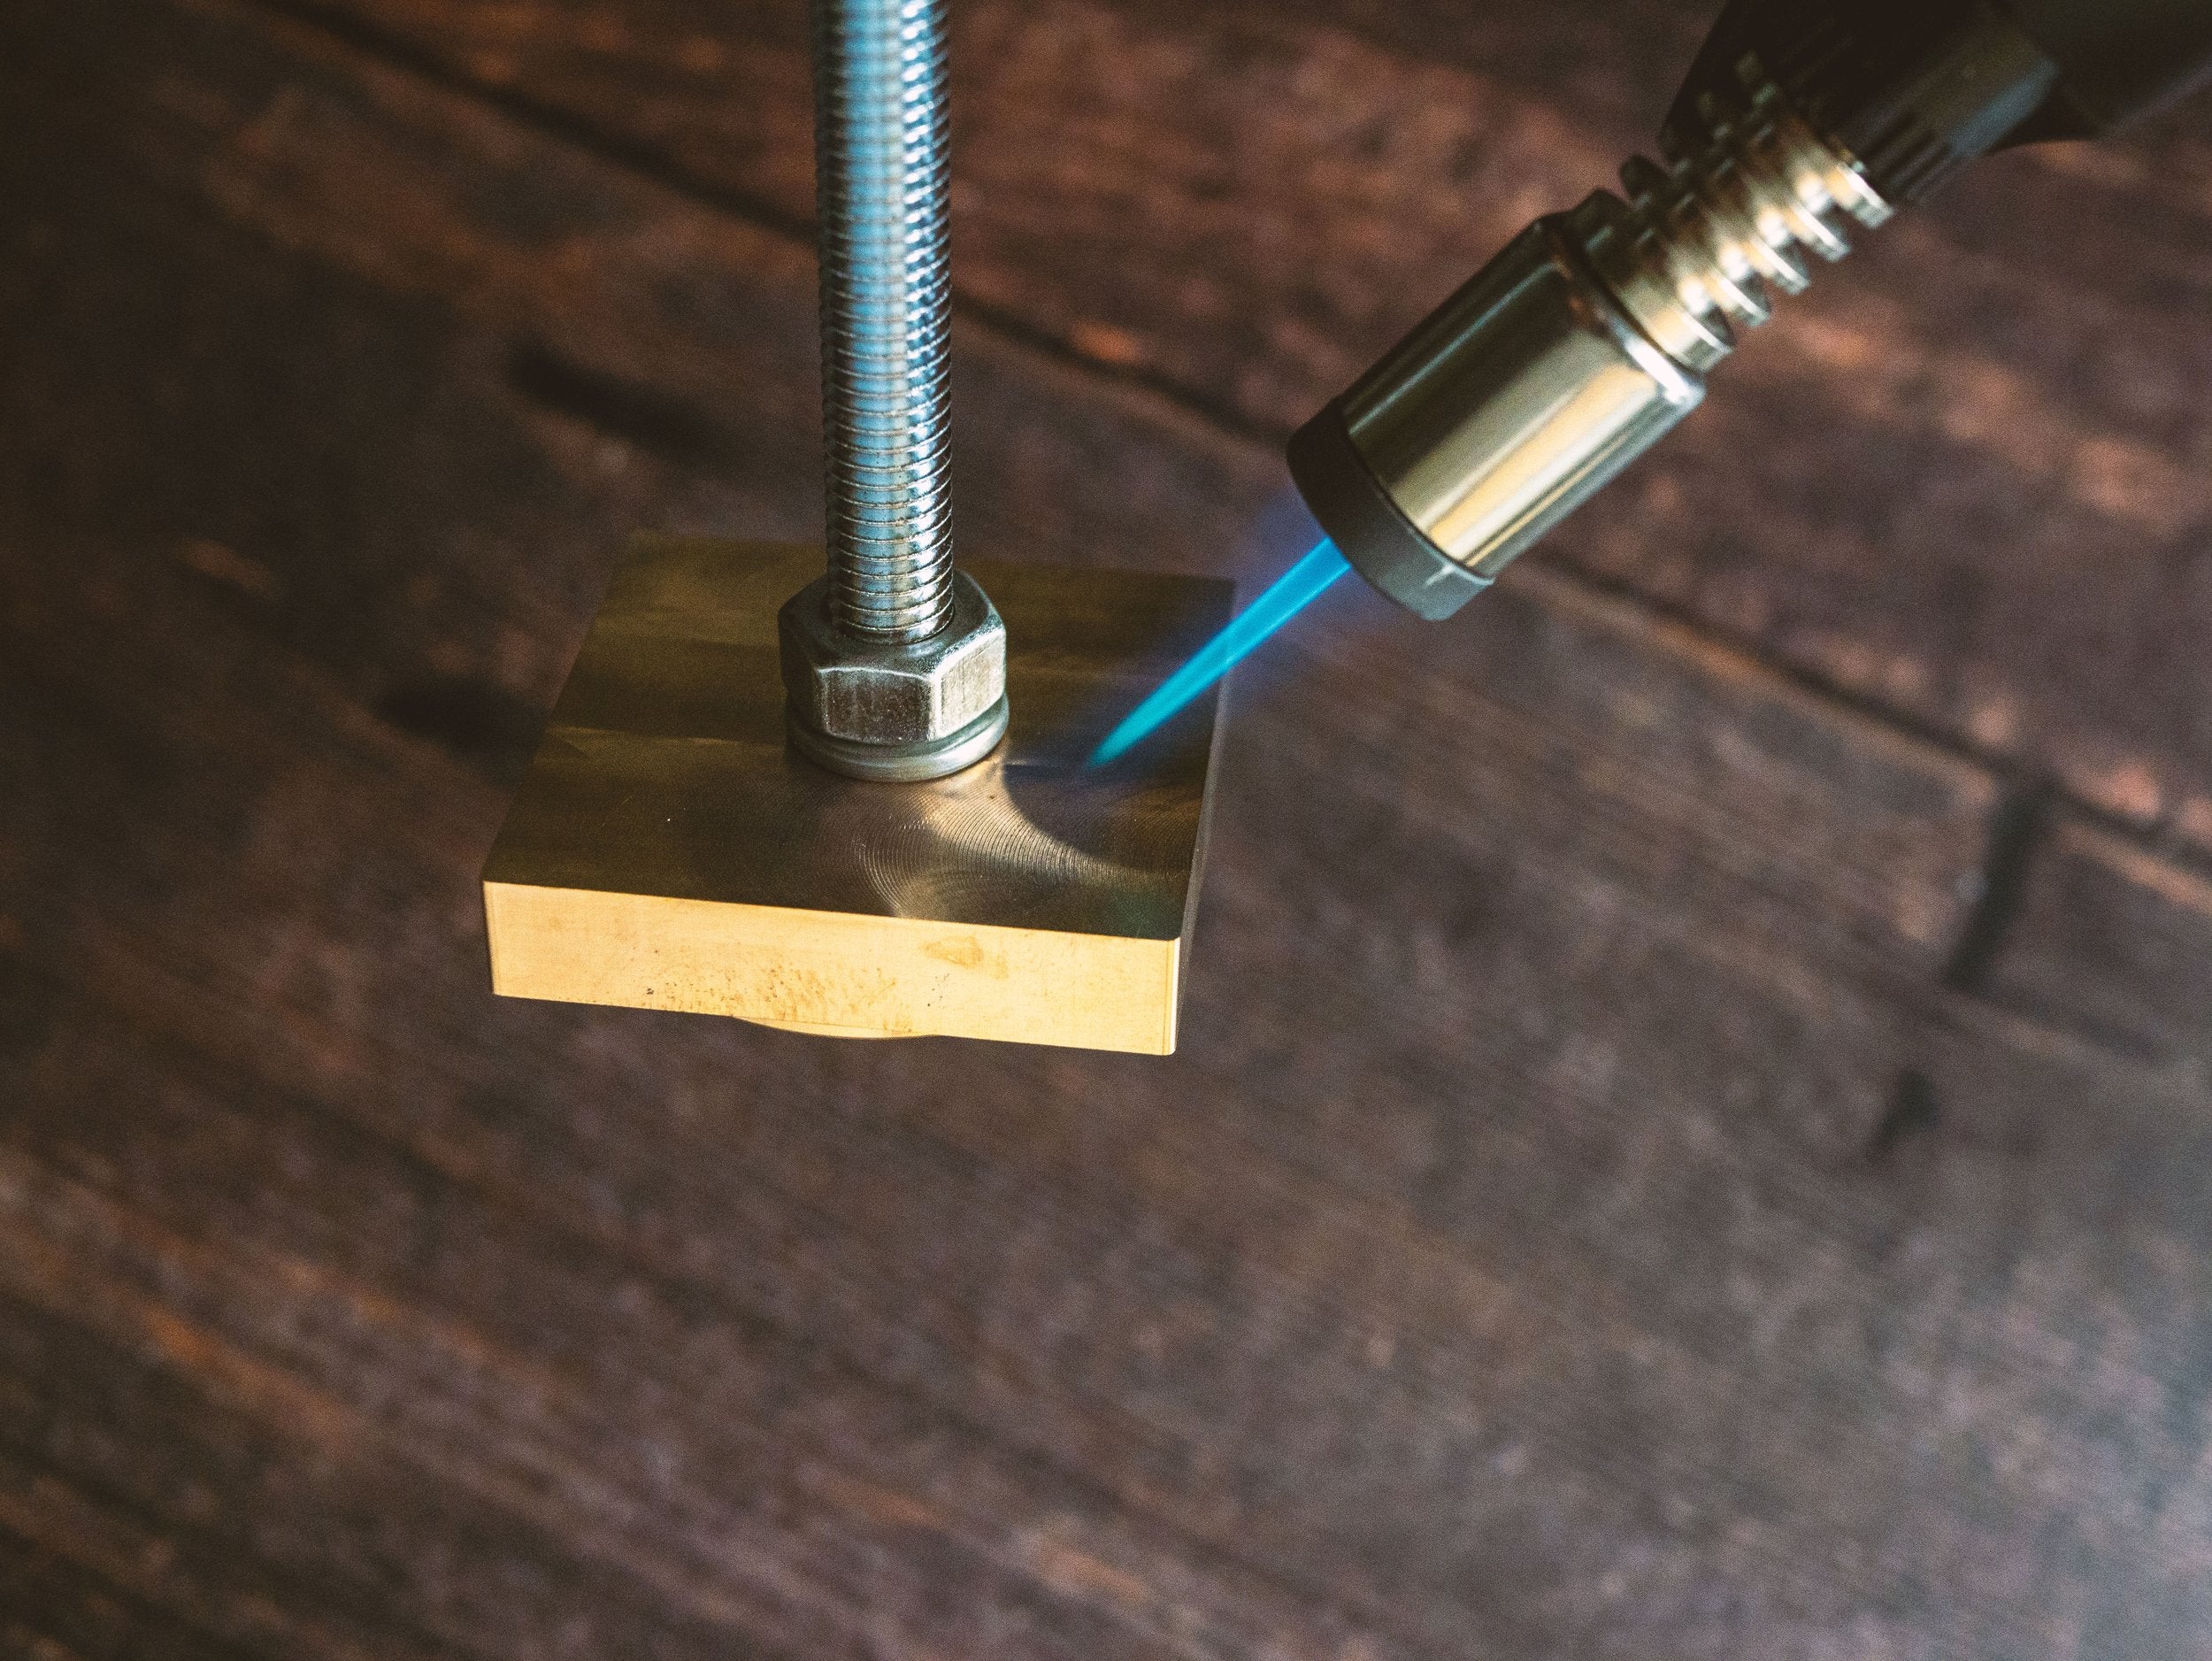
Heat your iron, ideally from the back side if using a handheld torch, and from the front side if using a standing torch. The brass will begin to change colour slightly as the iron heats up. Test periodically on some scrap wood to see how you are doing for temperature. Branding should take no more than 5 seconds with only light pressure on the wood.

Once you have confirmed your iron is up to temperature by testing on scrap wood, apply to your damp workpiece. Again, only use light pressure and try not to rock the iron too much. It’s important that the iron is hot enough (but not so hot that it cooks the wood!) to generate a good brand within 5 seconds or so, if the iron is held against the wood for longer than this, then the details may begin to merge/blur together.
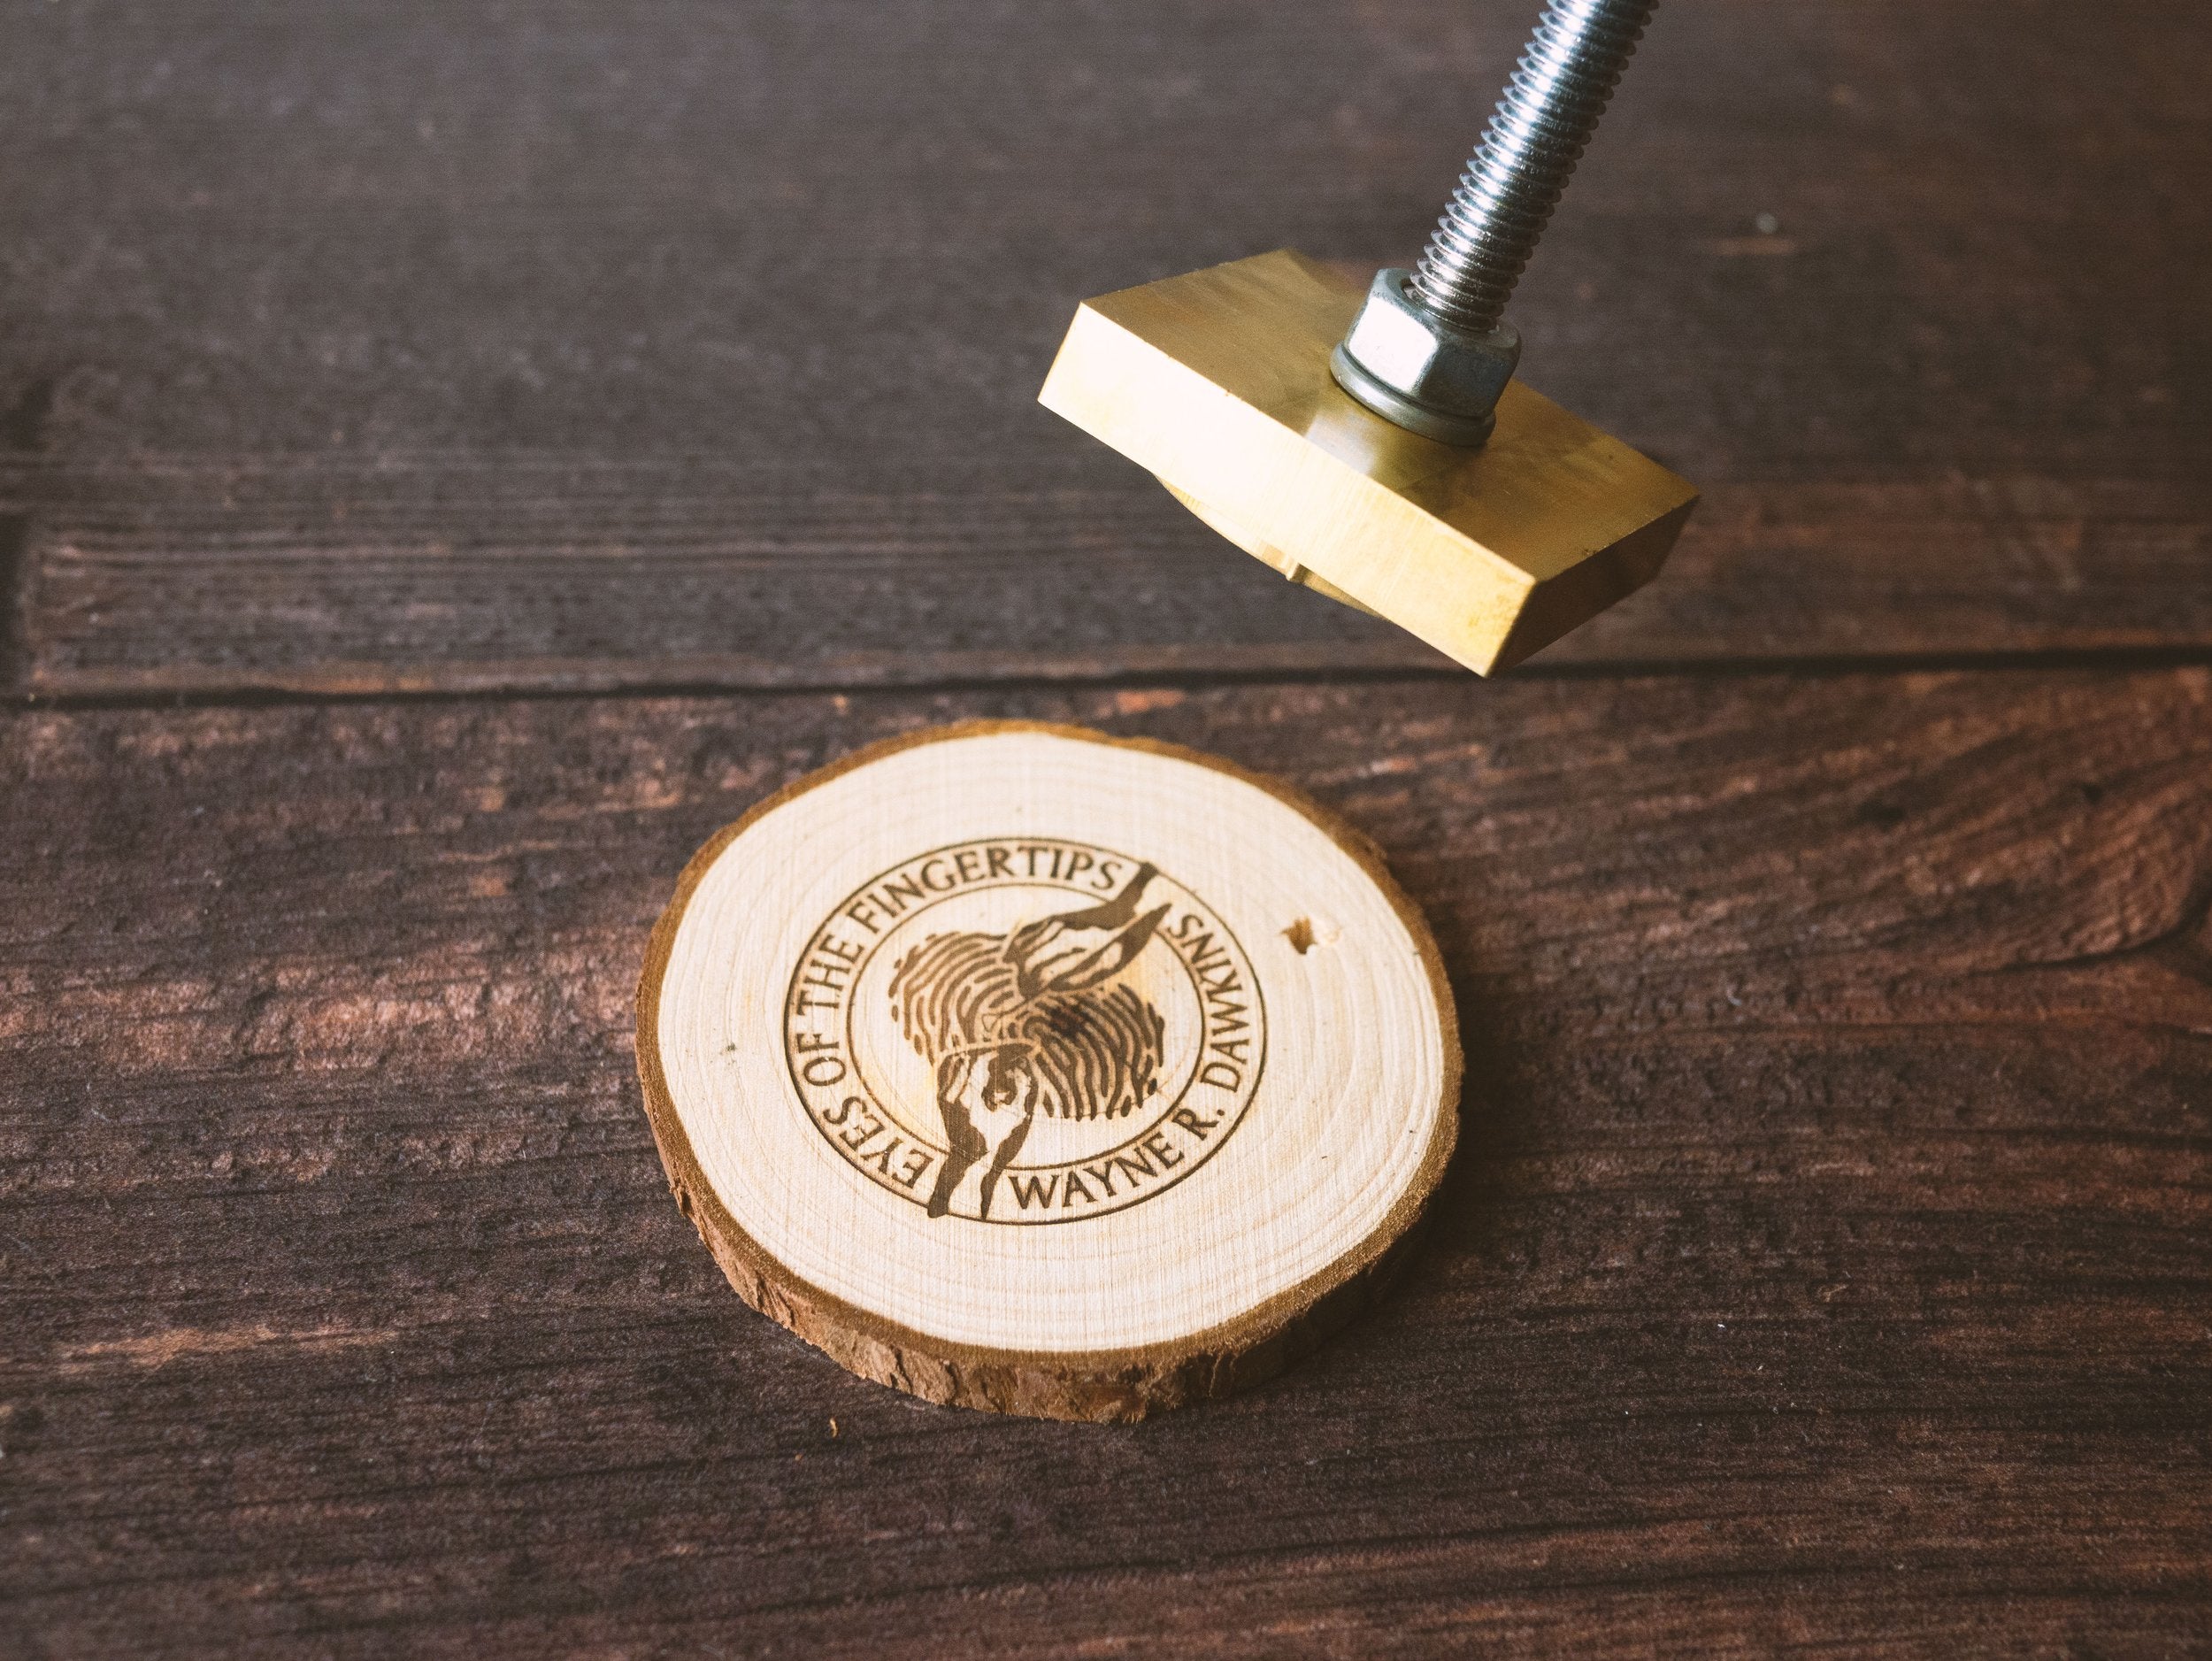
Check your result - a good brand will have a consistent finish with all details showing clearly. Your work can be sanded back to improve definition if desired.
Start by screwing in the handle to the iron itself. Ensure the spring washer is between the nut and the iron. Please be careful not to overtighten.
Tighten the nut against the spring washer until the spring washer is sitting flat. Please be careful not to overtighten this as only a small amount of torque is required.
Spray water on the wood that you intend to brand. This will help manage the heat coming off your iron once applied and keep the areas that are meant to be unbranded clear, allowing the details to pop!
Heat your iron, ideally from the back side if using a handheld torch, and from the front side if using a standing torch. The brass will begin to change colour slightly as the iron heats up. Test periodically on some scrap wood to see how you are doing for temperature. Branding should take no more than 5 seconds with only light pressure on the wood.
Once you have confirmed your iron is up to temperature by testing on scrap wood, apply to your damp workpiece. Again, only use light pressure and try not to rock the iron too much. It’s important that the iron is hot enough (but not so hot that it cooks the wood!) to generate a good brand within 5 seconds or so, if the iron is held against the wood for longer than this, then the details may begin to merge/blur together.
Check your result - a good brand will have a consistent finish with all details showing clearly. Your work can be sanded back to improve definition if desired.