

This guide will walk you through how to brand your woodworking projects using our electric branding irons.
Our electric irons allow for an easier wood burning process than our fire heated irons as the temperature variable is taken out of the equation.
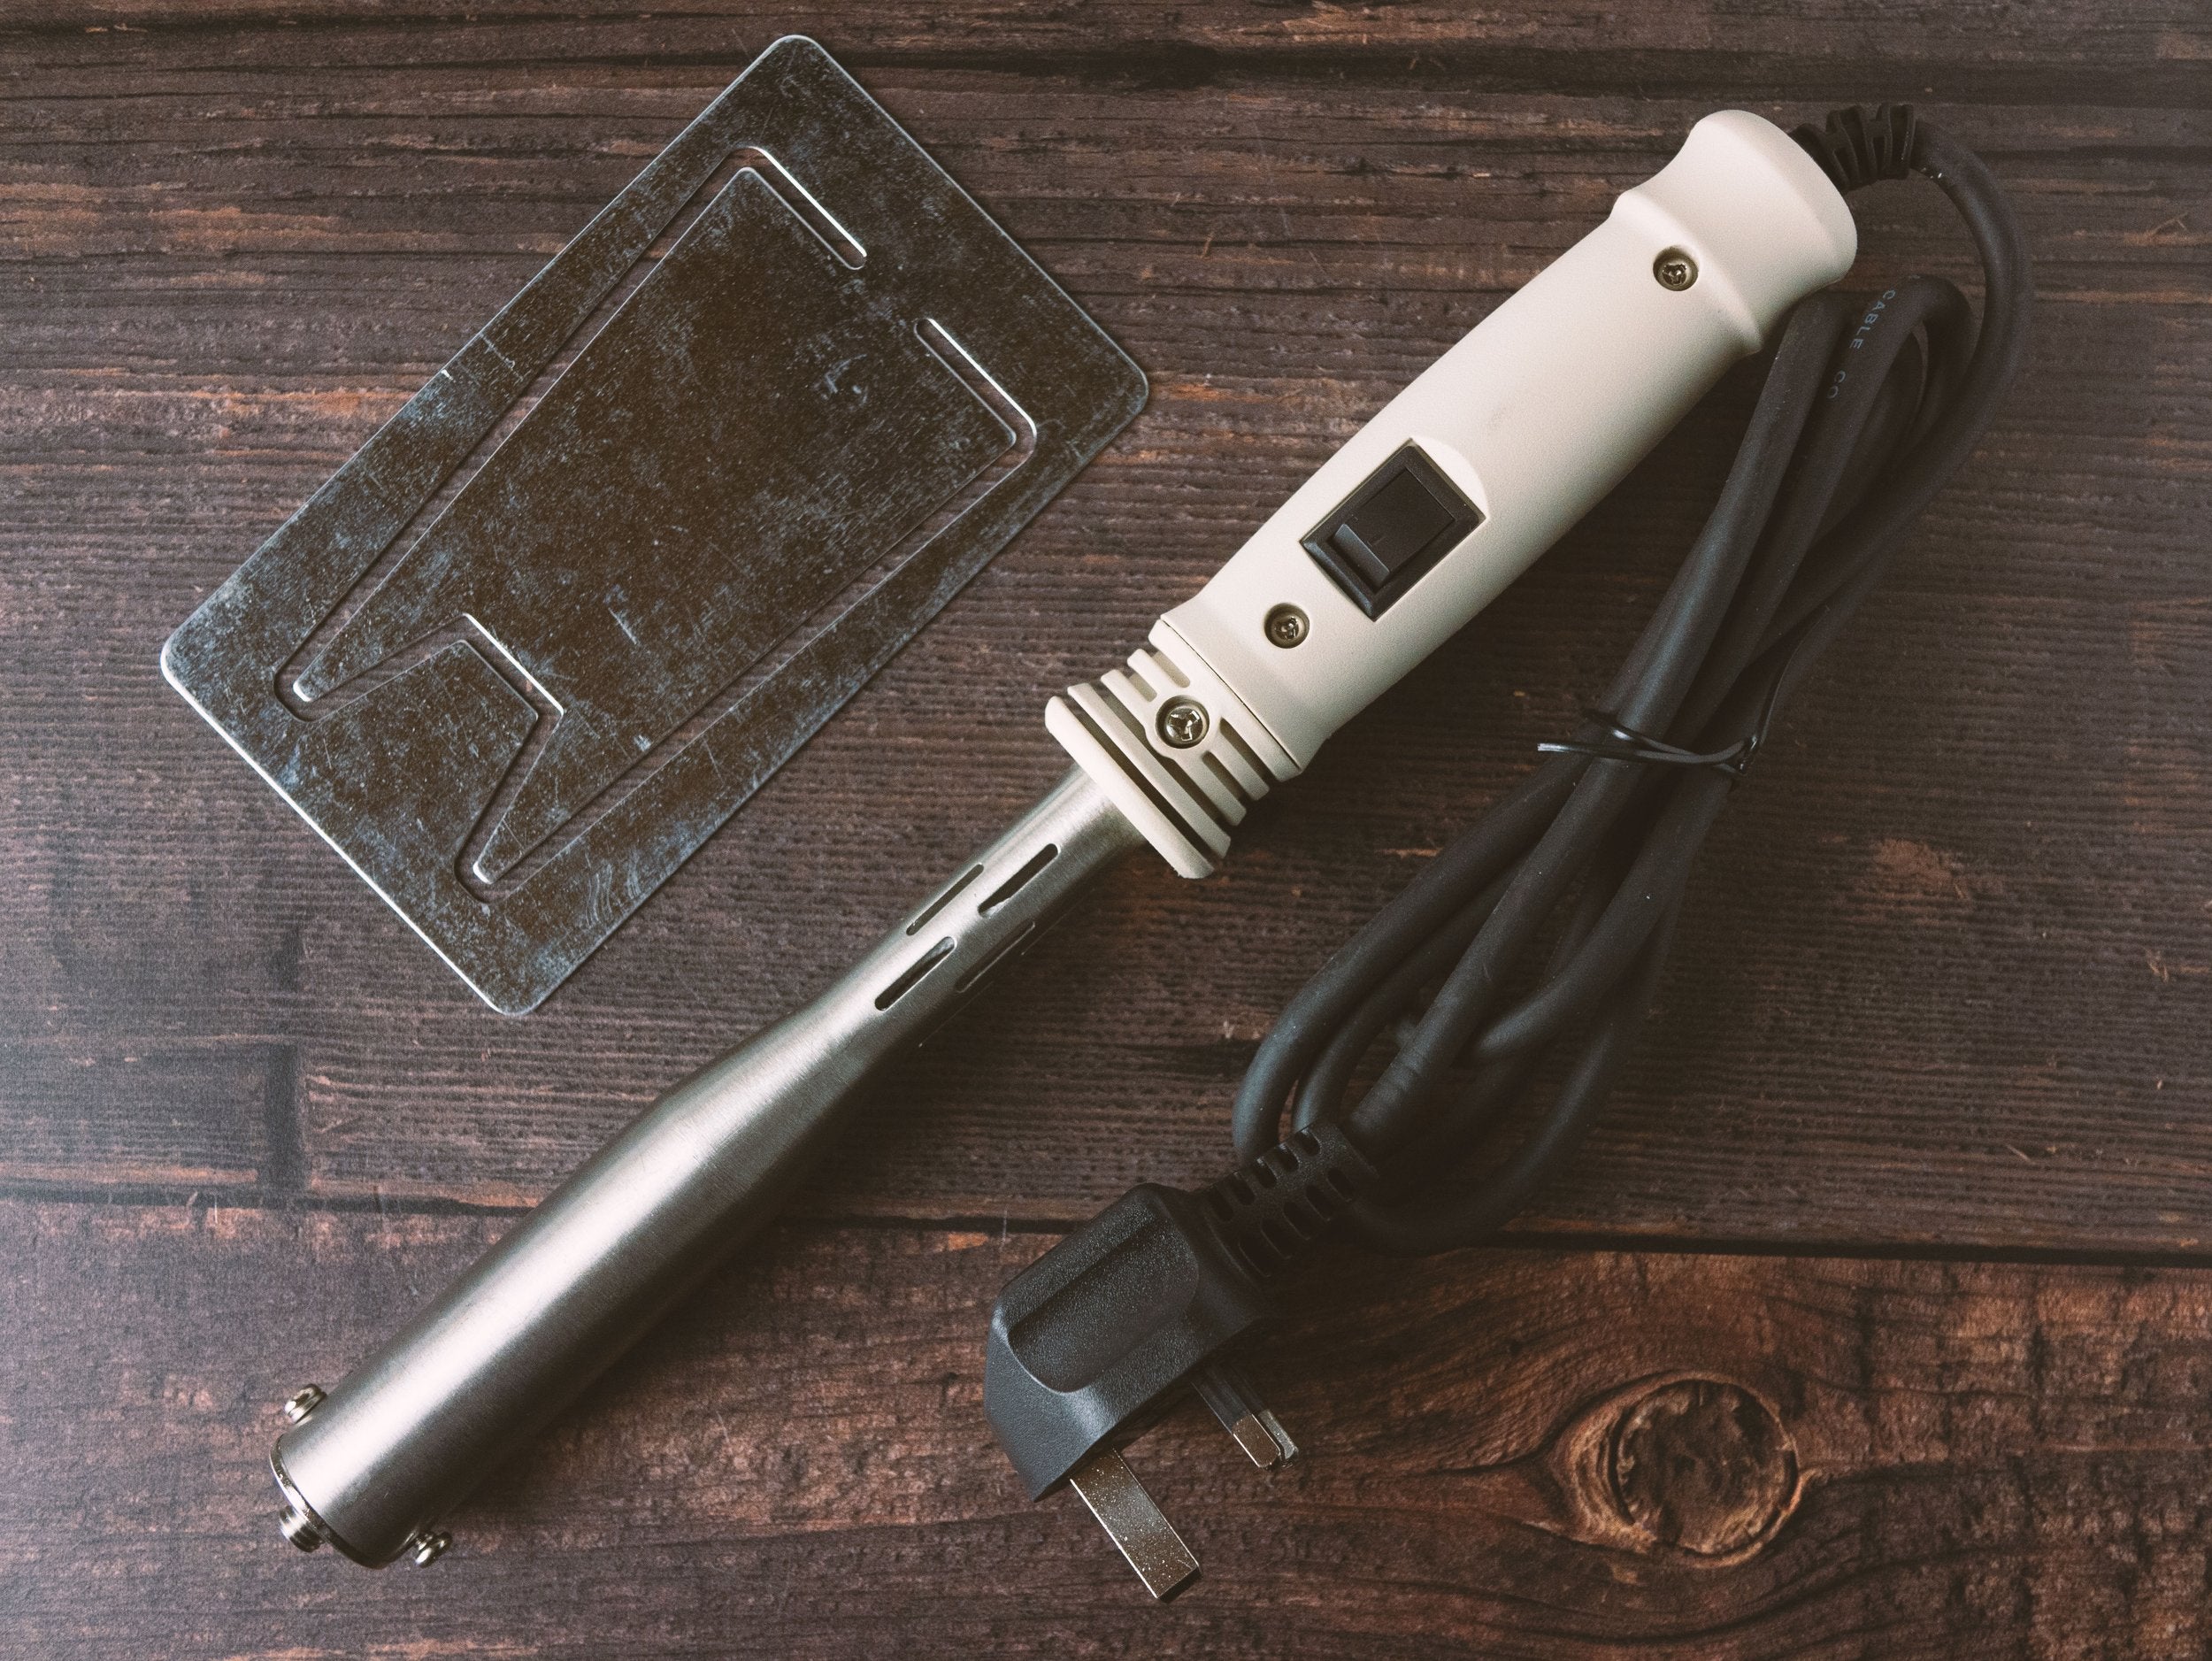
Things needed:
- Brass branding iron (included in kit)
- Electric heater (optional in our store)
- Spring washer (included in kit with electric heater)
- Metal stand (included in kit with electric heater)
- Phillips screwdriver
- Spray bottle filled with water
- Scrap wood for checking temperature
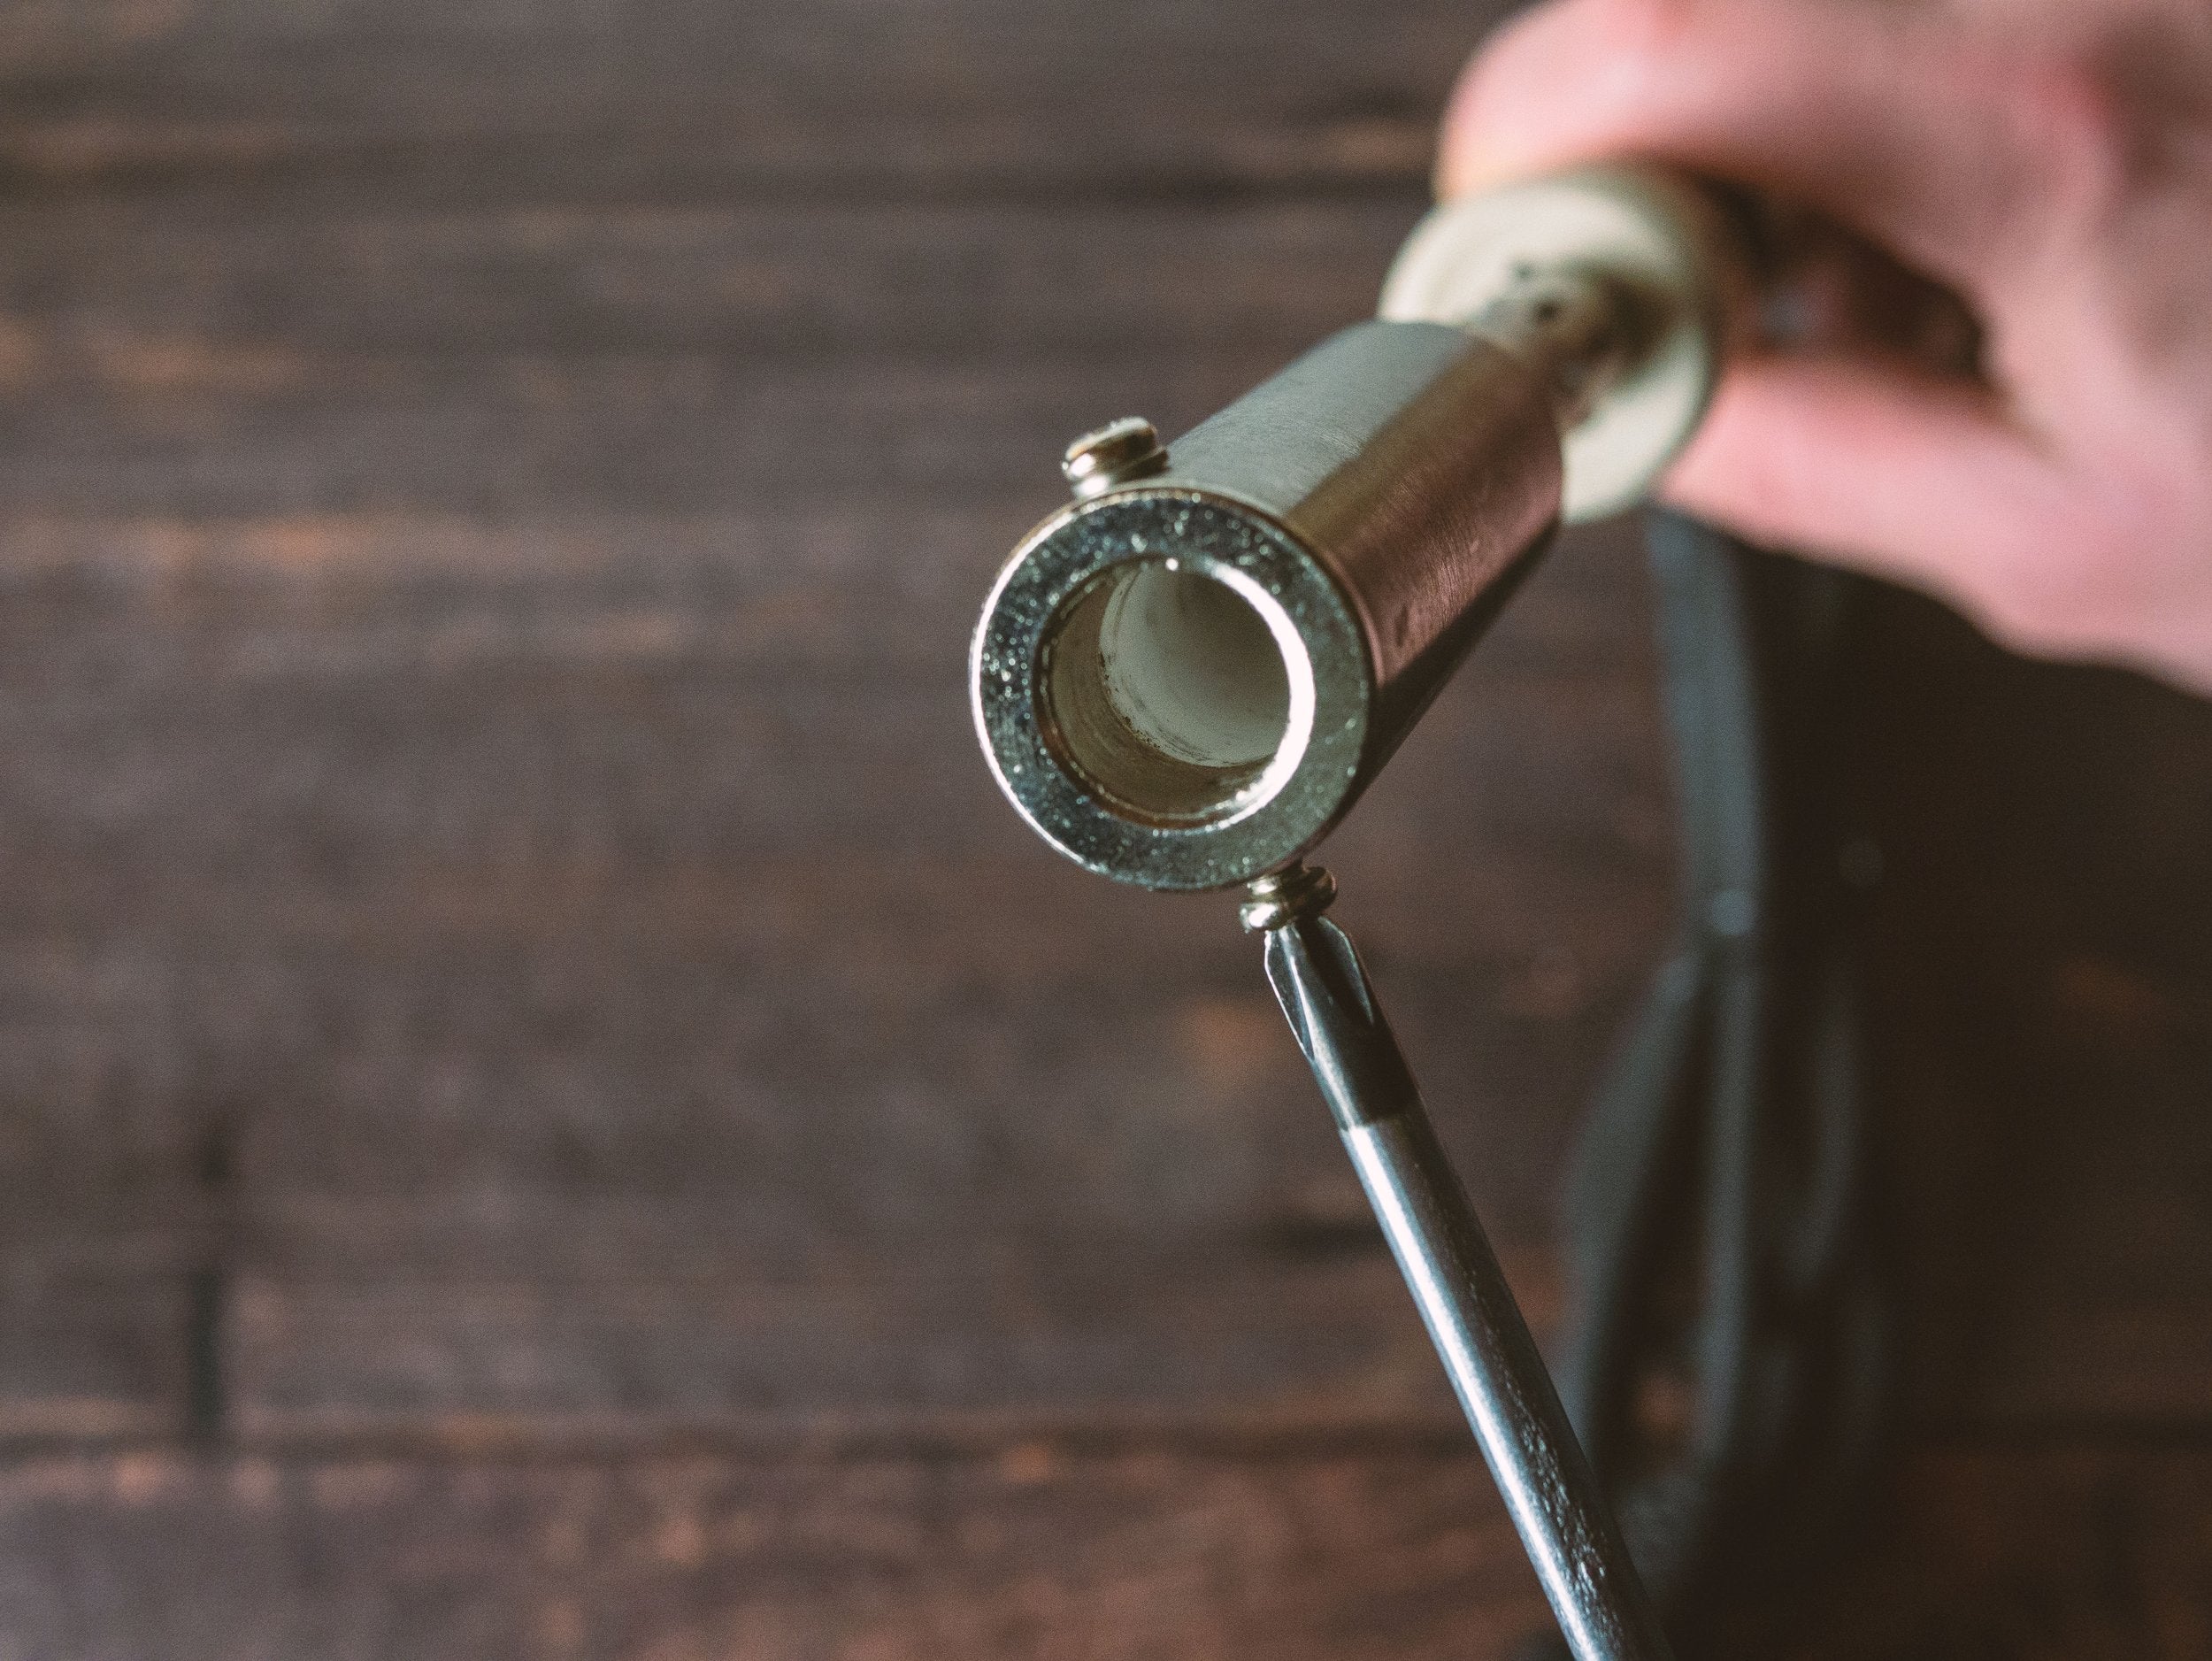
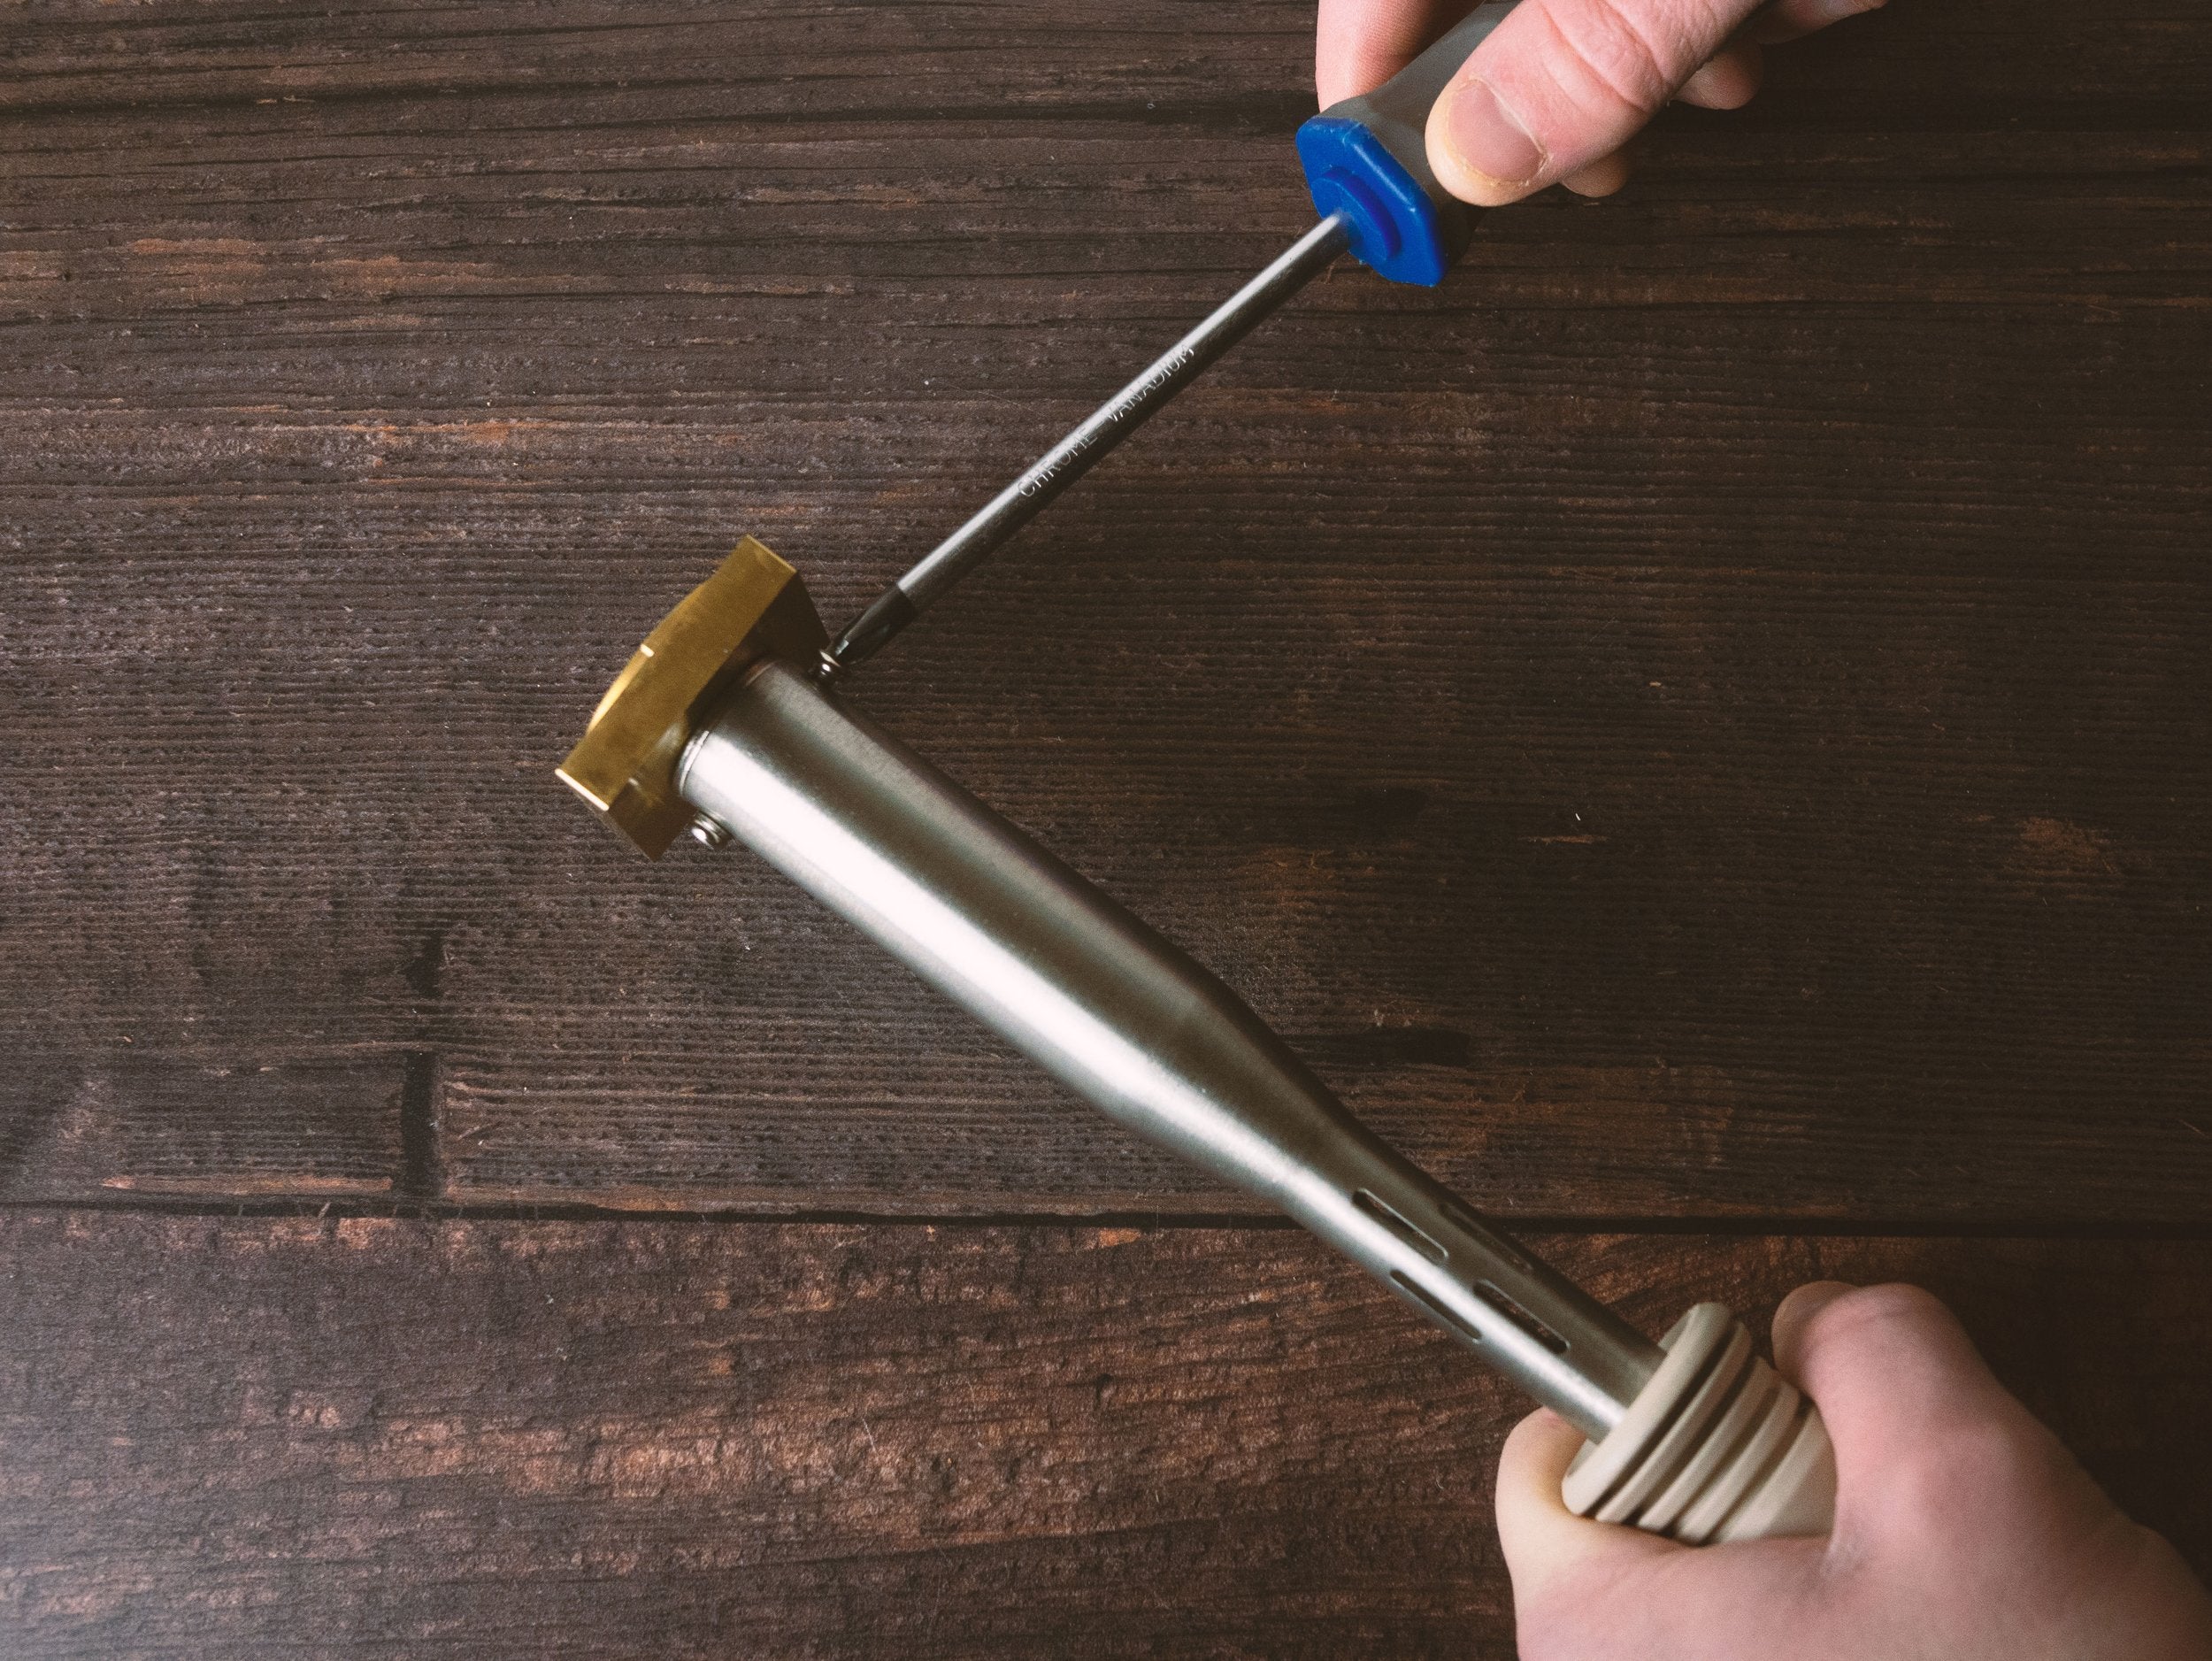
Begin by ensuring the screw that secures the rod that screws into your iron is backed out sufficiently to allow the rod to enter the bore. Please note there is only one screw that secures this rod - the other must be left alone (the side with the washer on must be left alone).
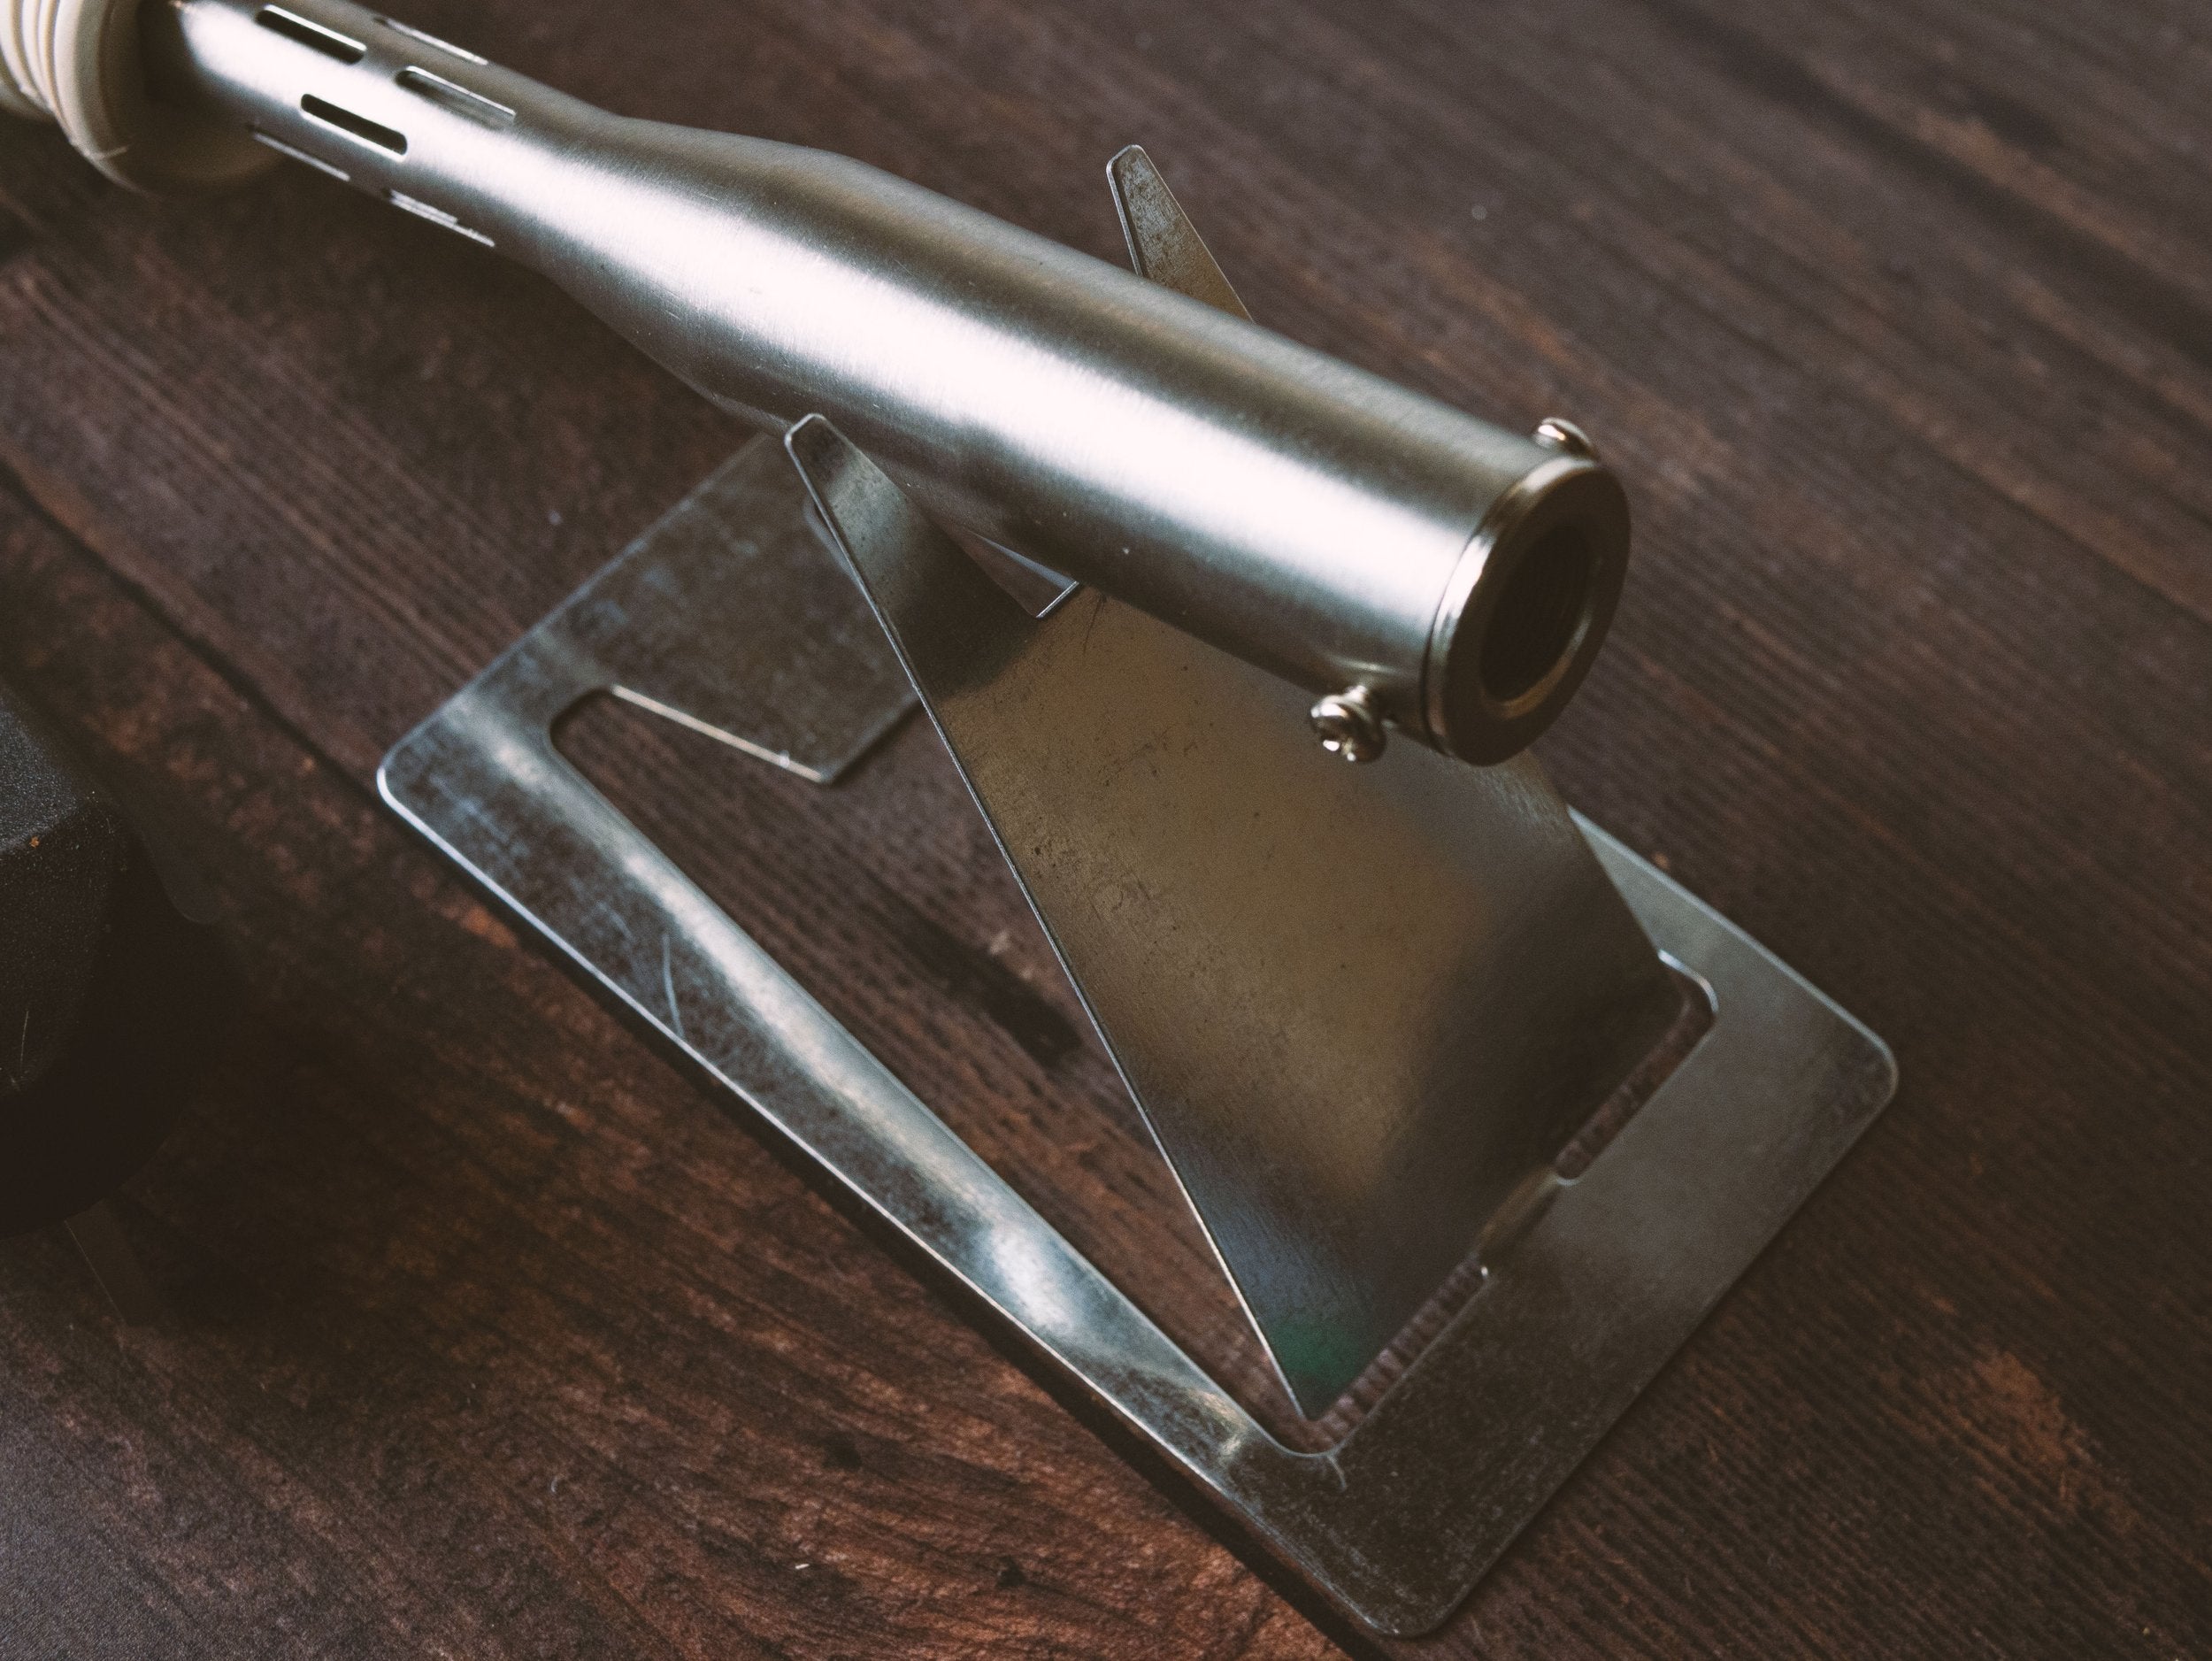
Fold out the metal stand and place your electric heater on it.
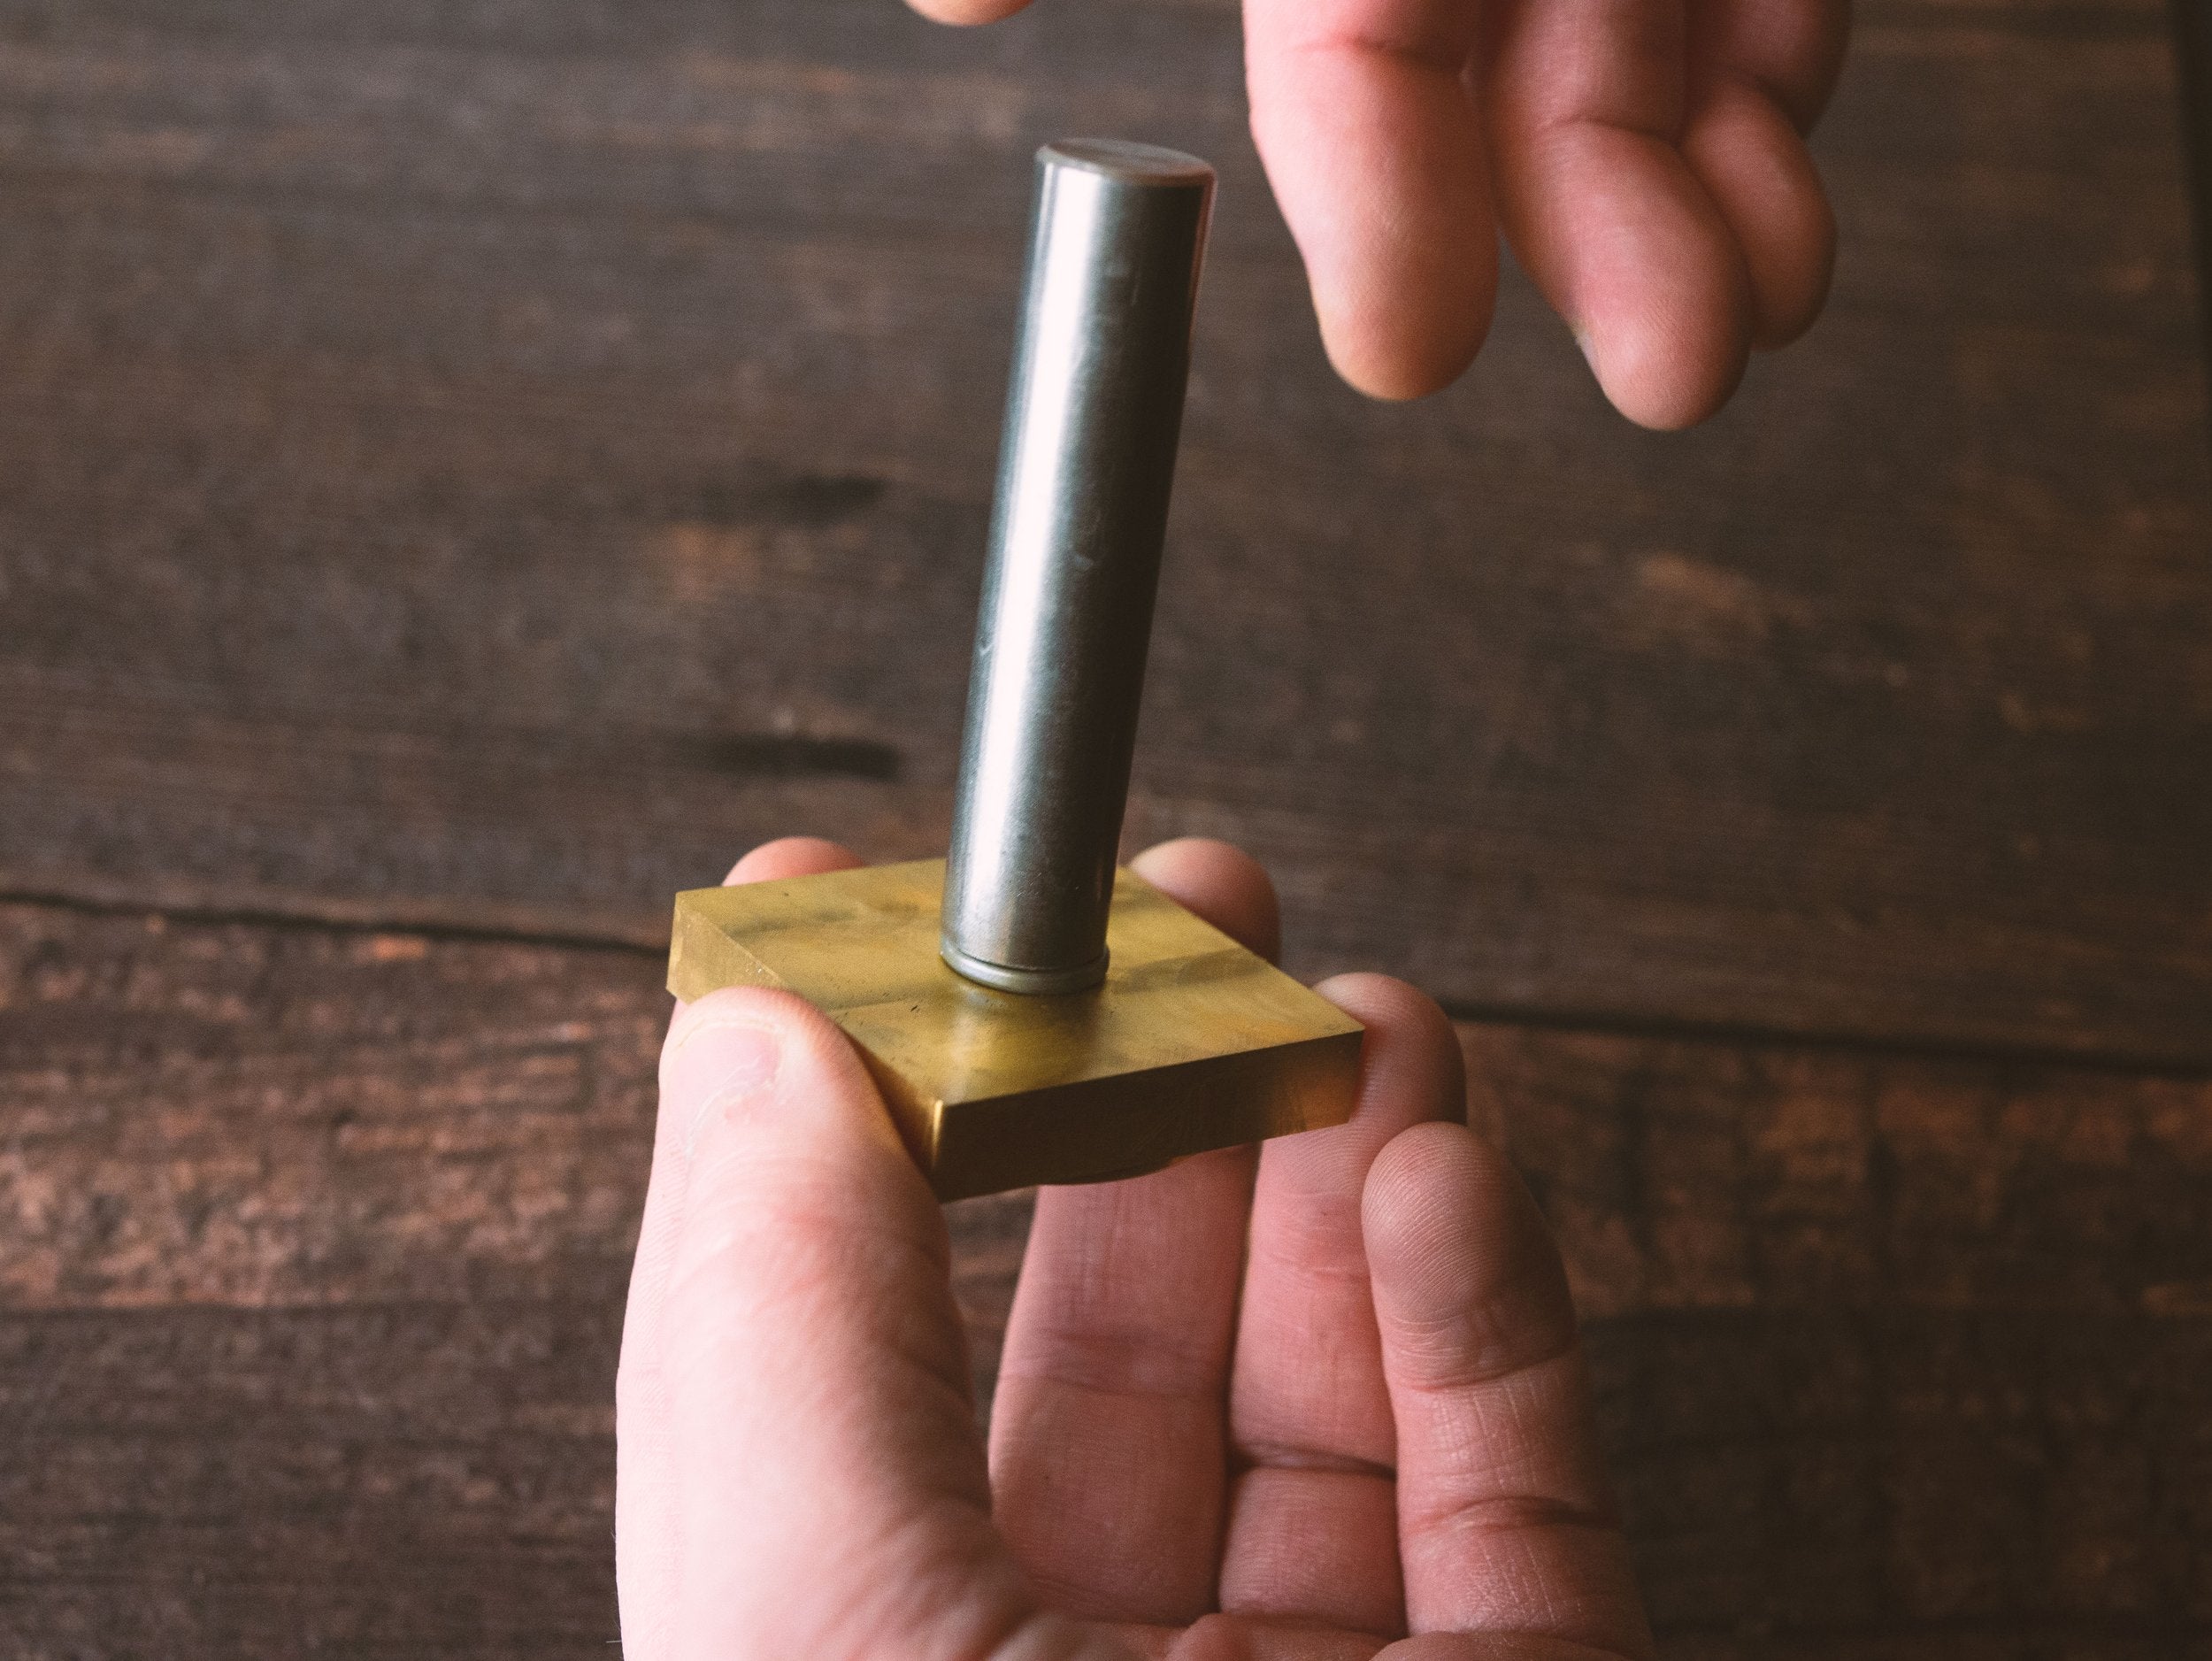
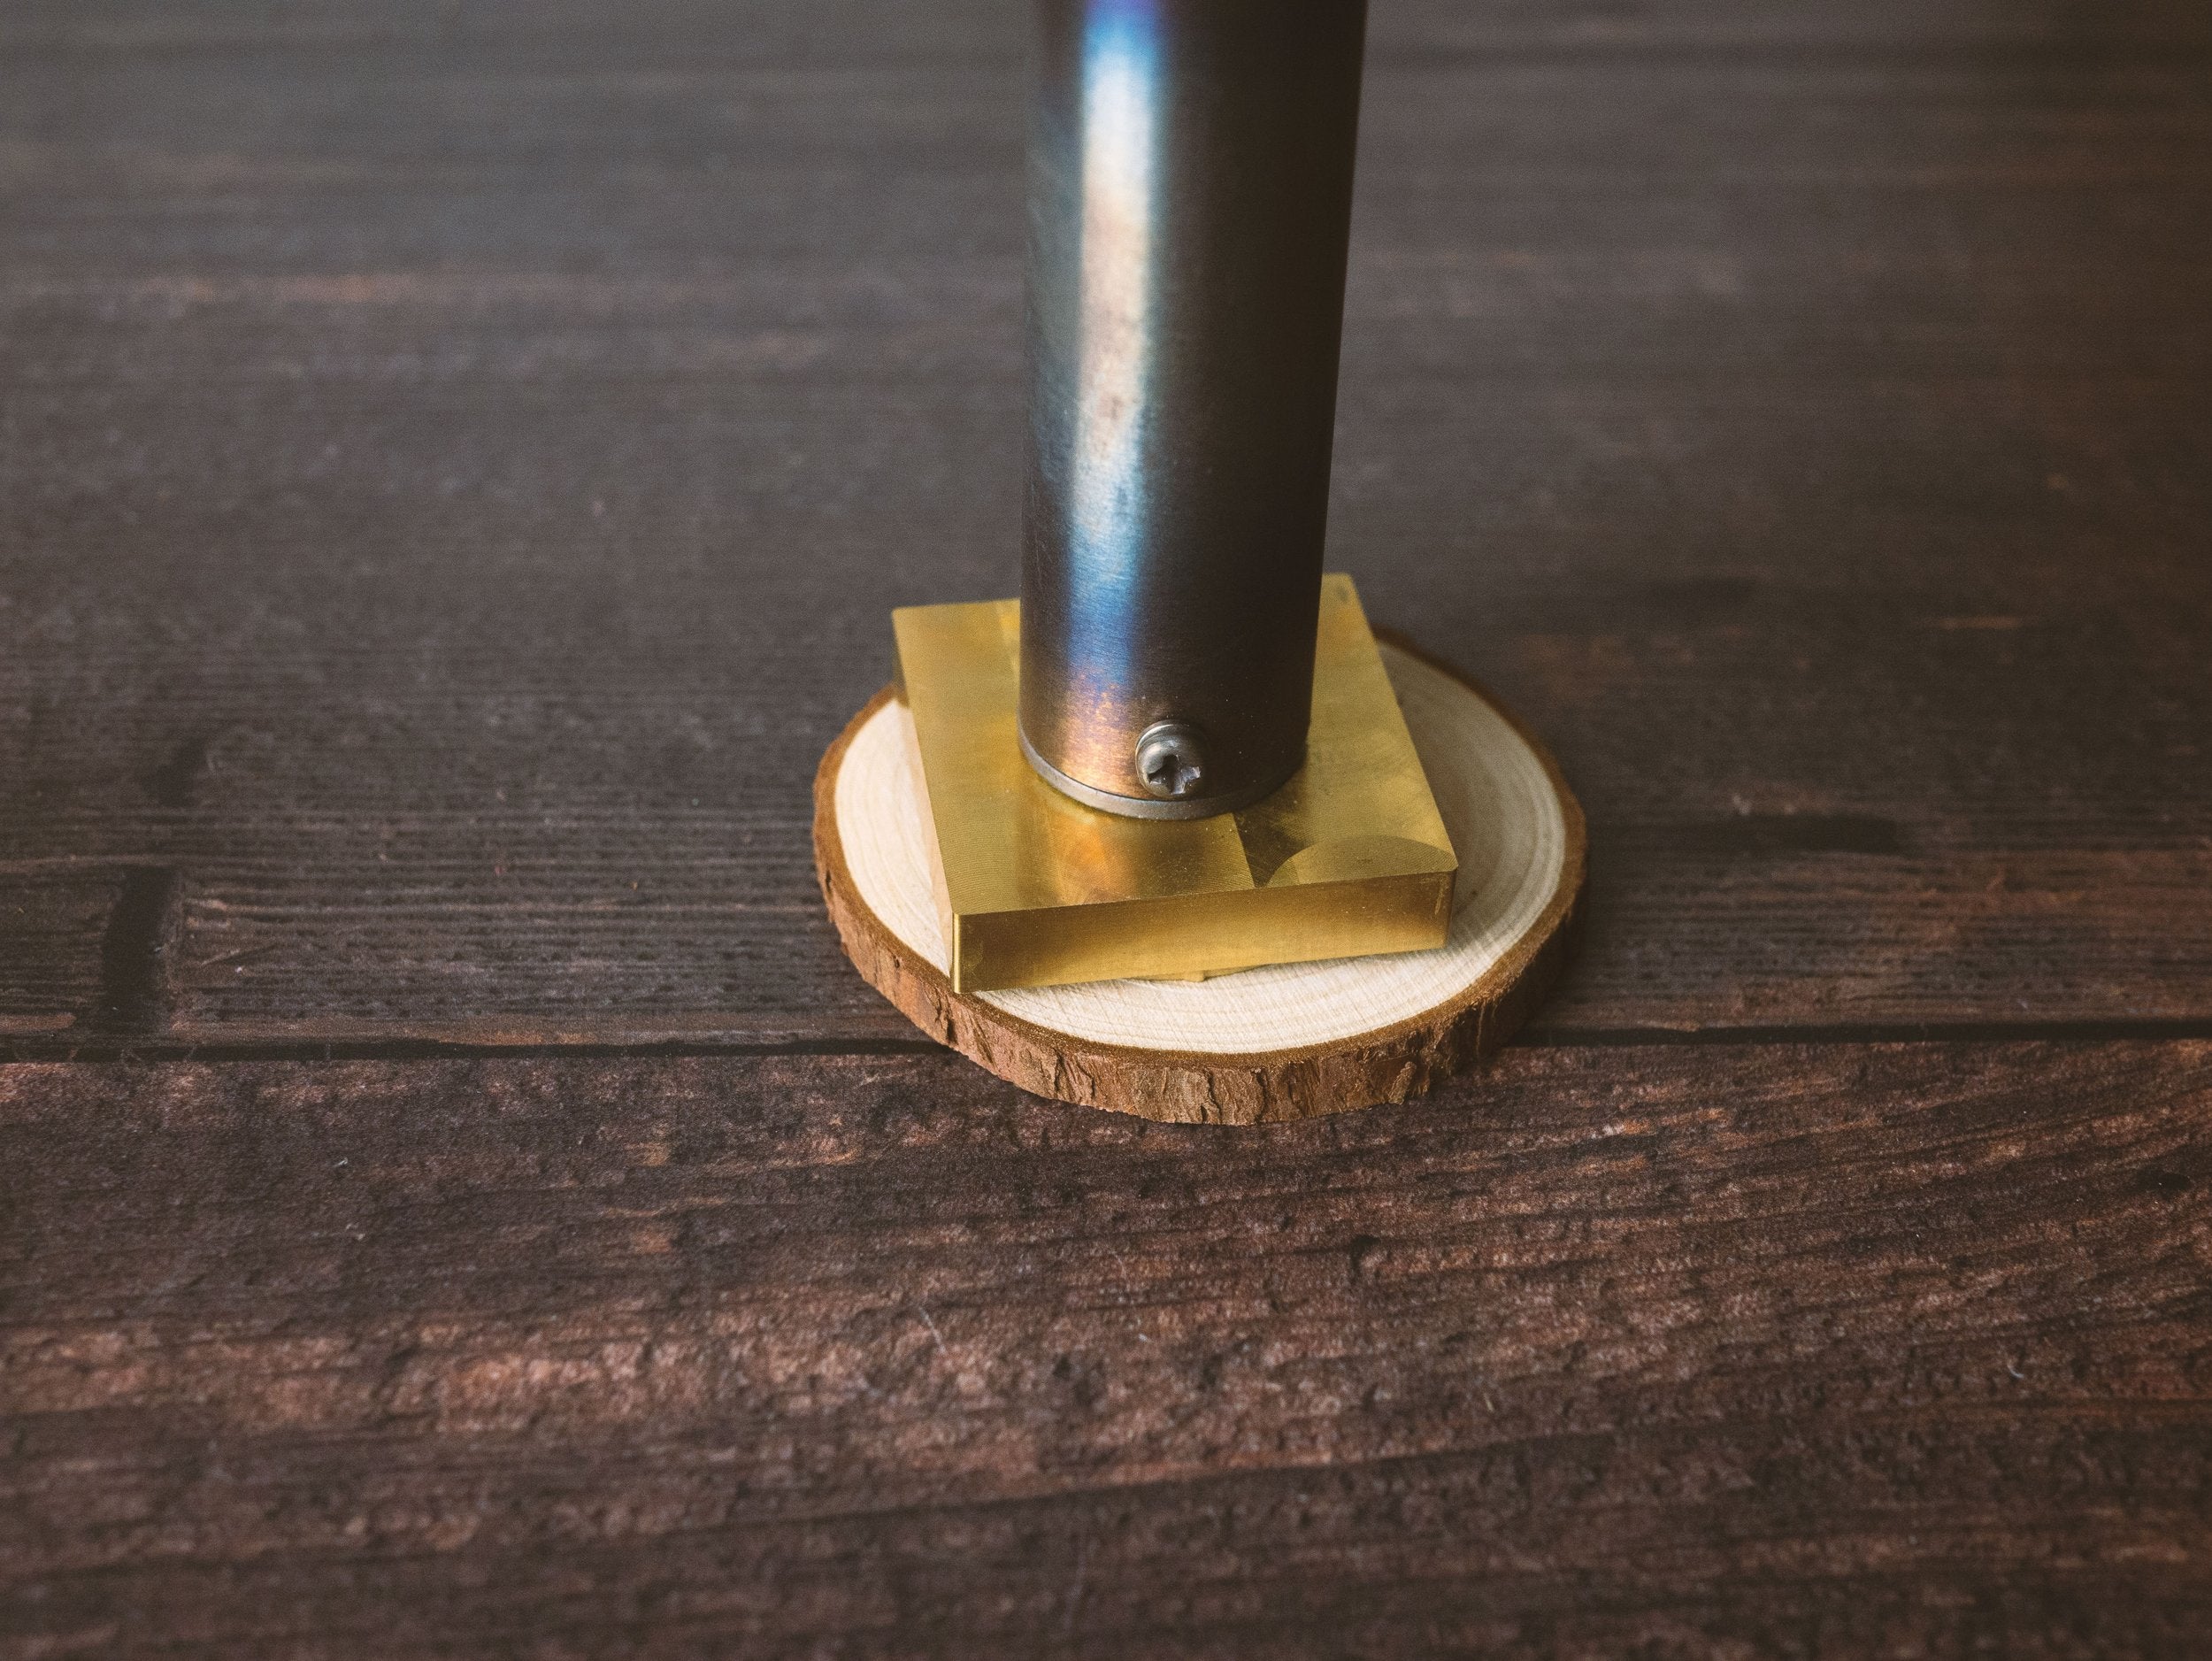
Screw the metal rod into your iron with the spring washer in place. Fully tighten this by hand.
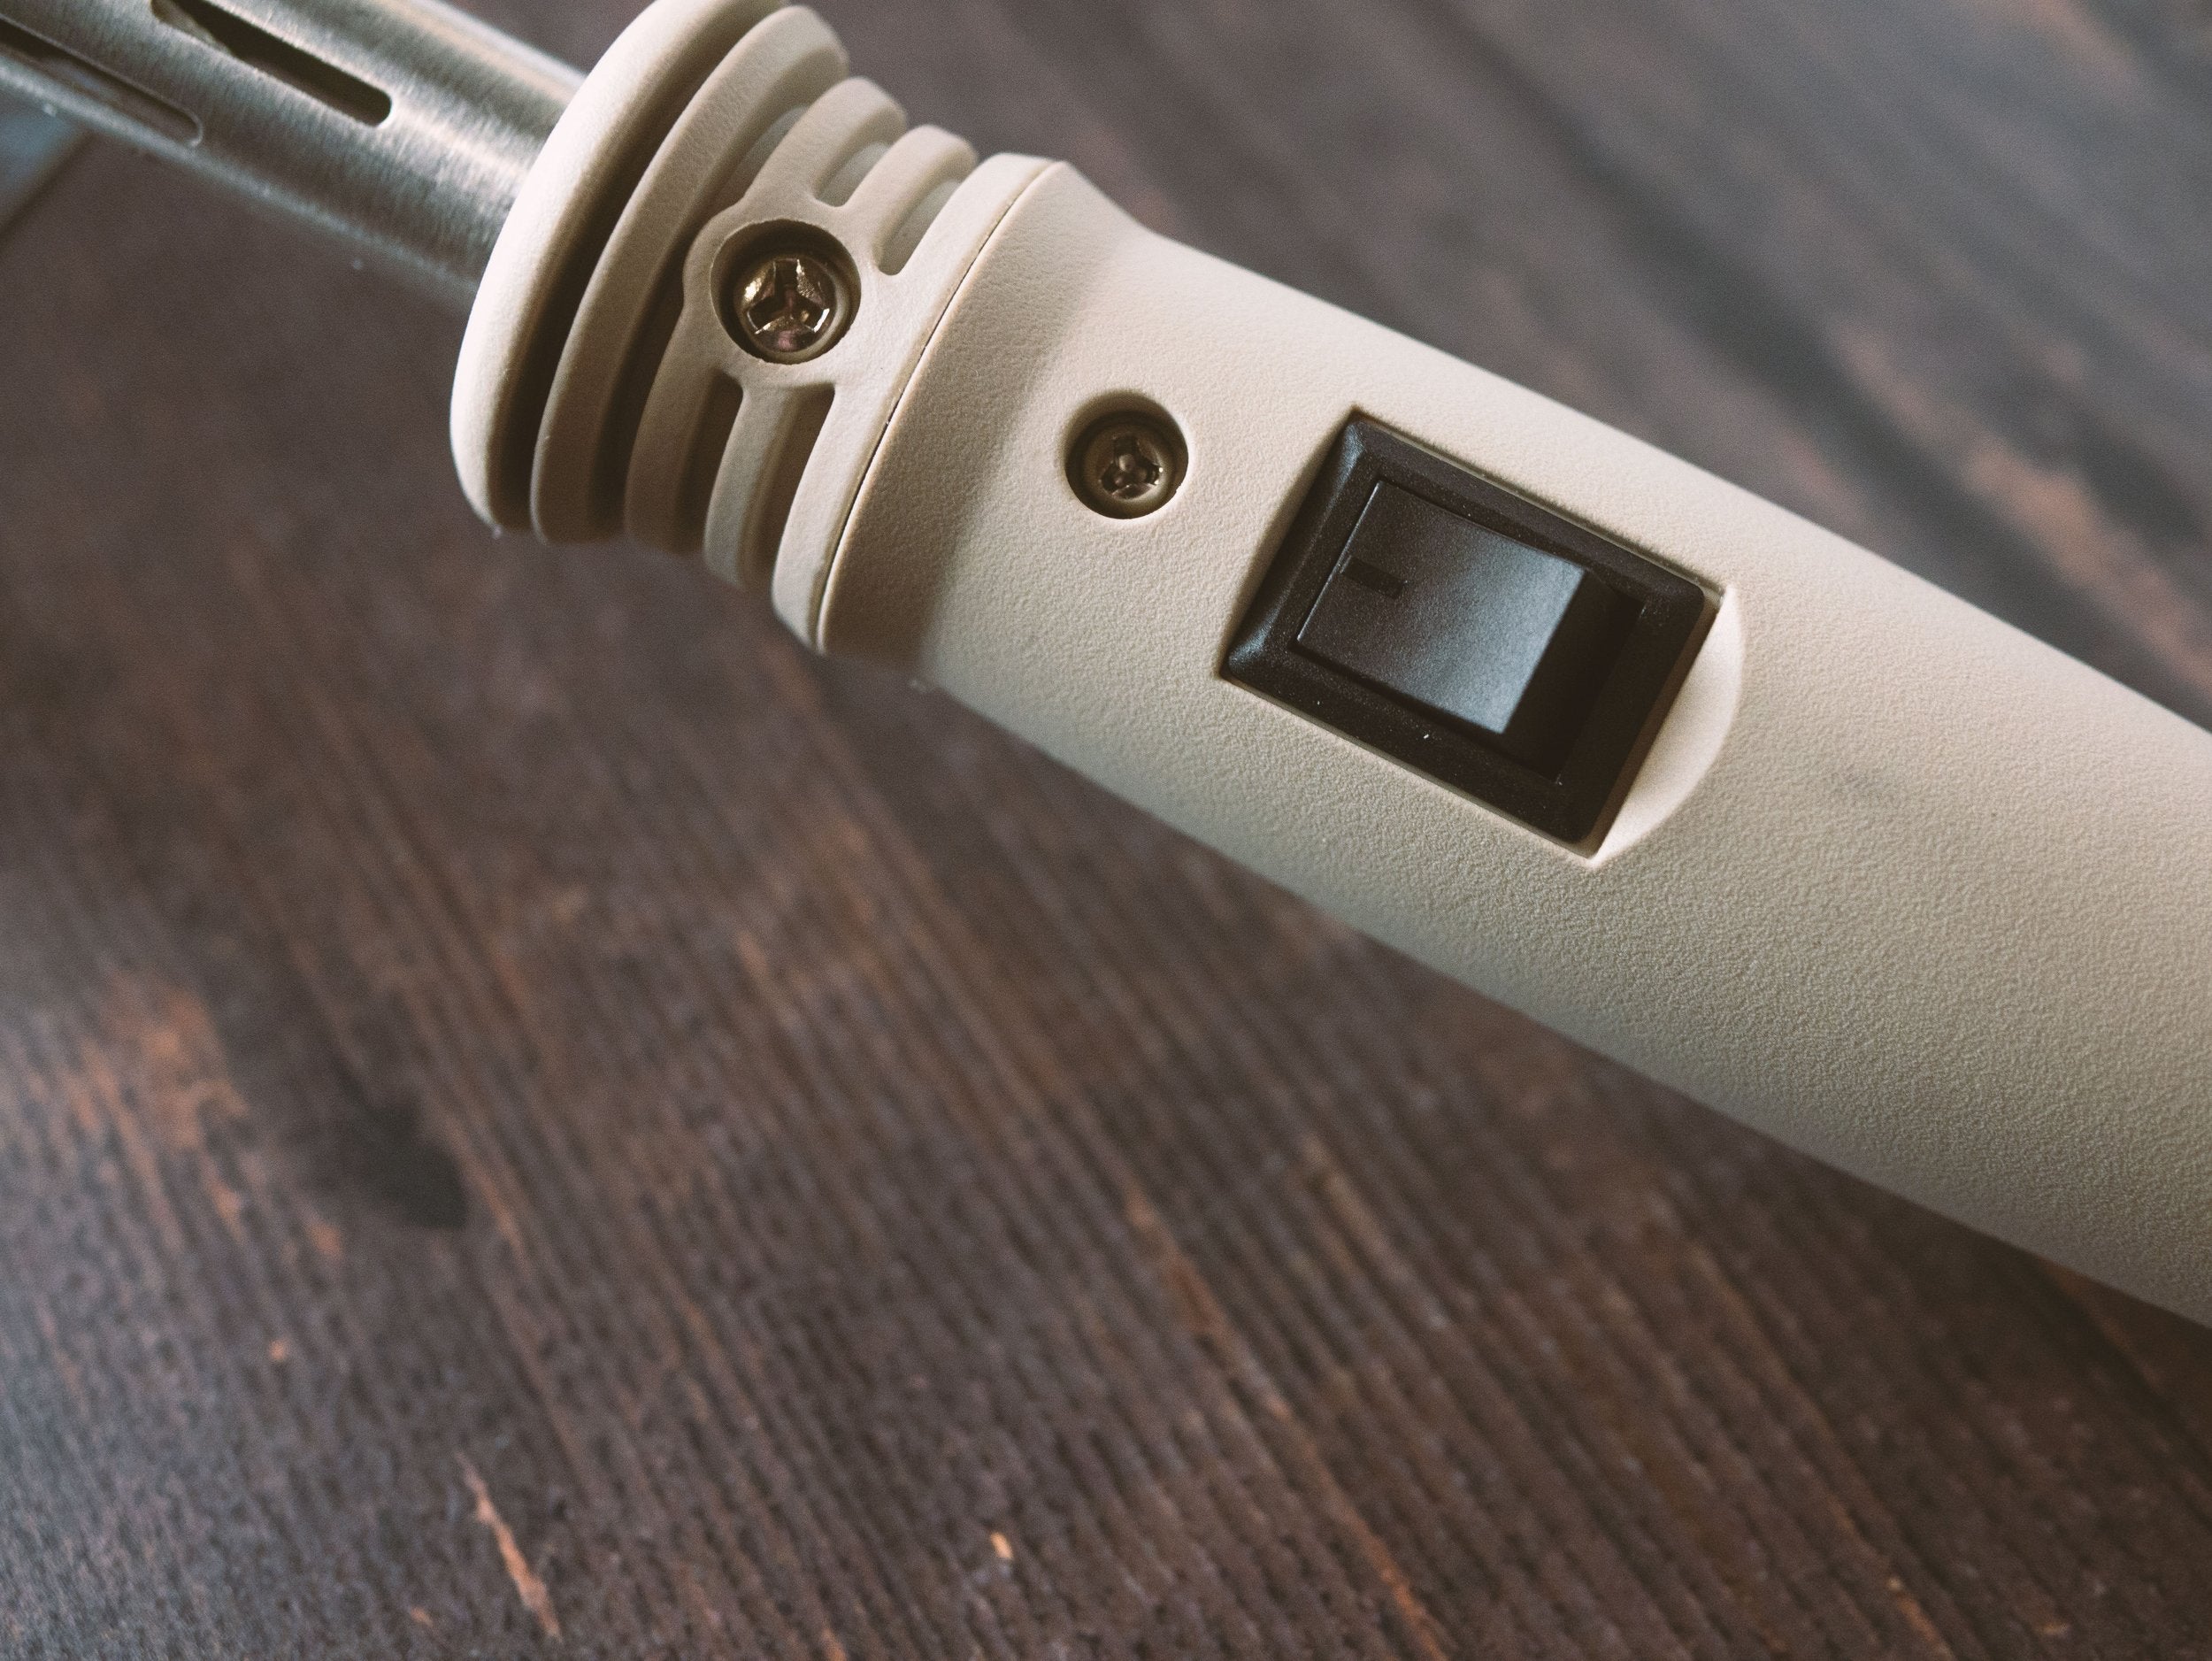
Fully insert the branding iron with the rod attached into the electric heater and tighten the single screw that secures this in place. Please be careful not to overtighten this.
Plug the electric heater in, turn on, and place on the stand. Heating times will vary between 5 and 20 minutes depending on the size of your iron. Please note that new electric heaters will burn off manufacturing oils for the first 20-30 minutes of use, so ensure the first use is in a well ventilated area.
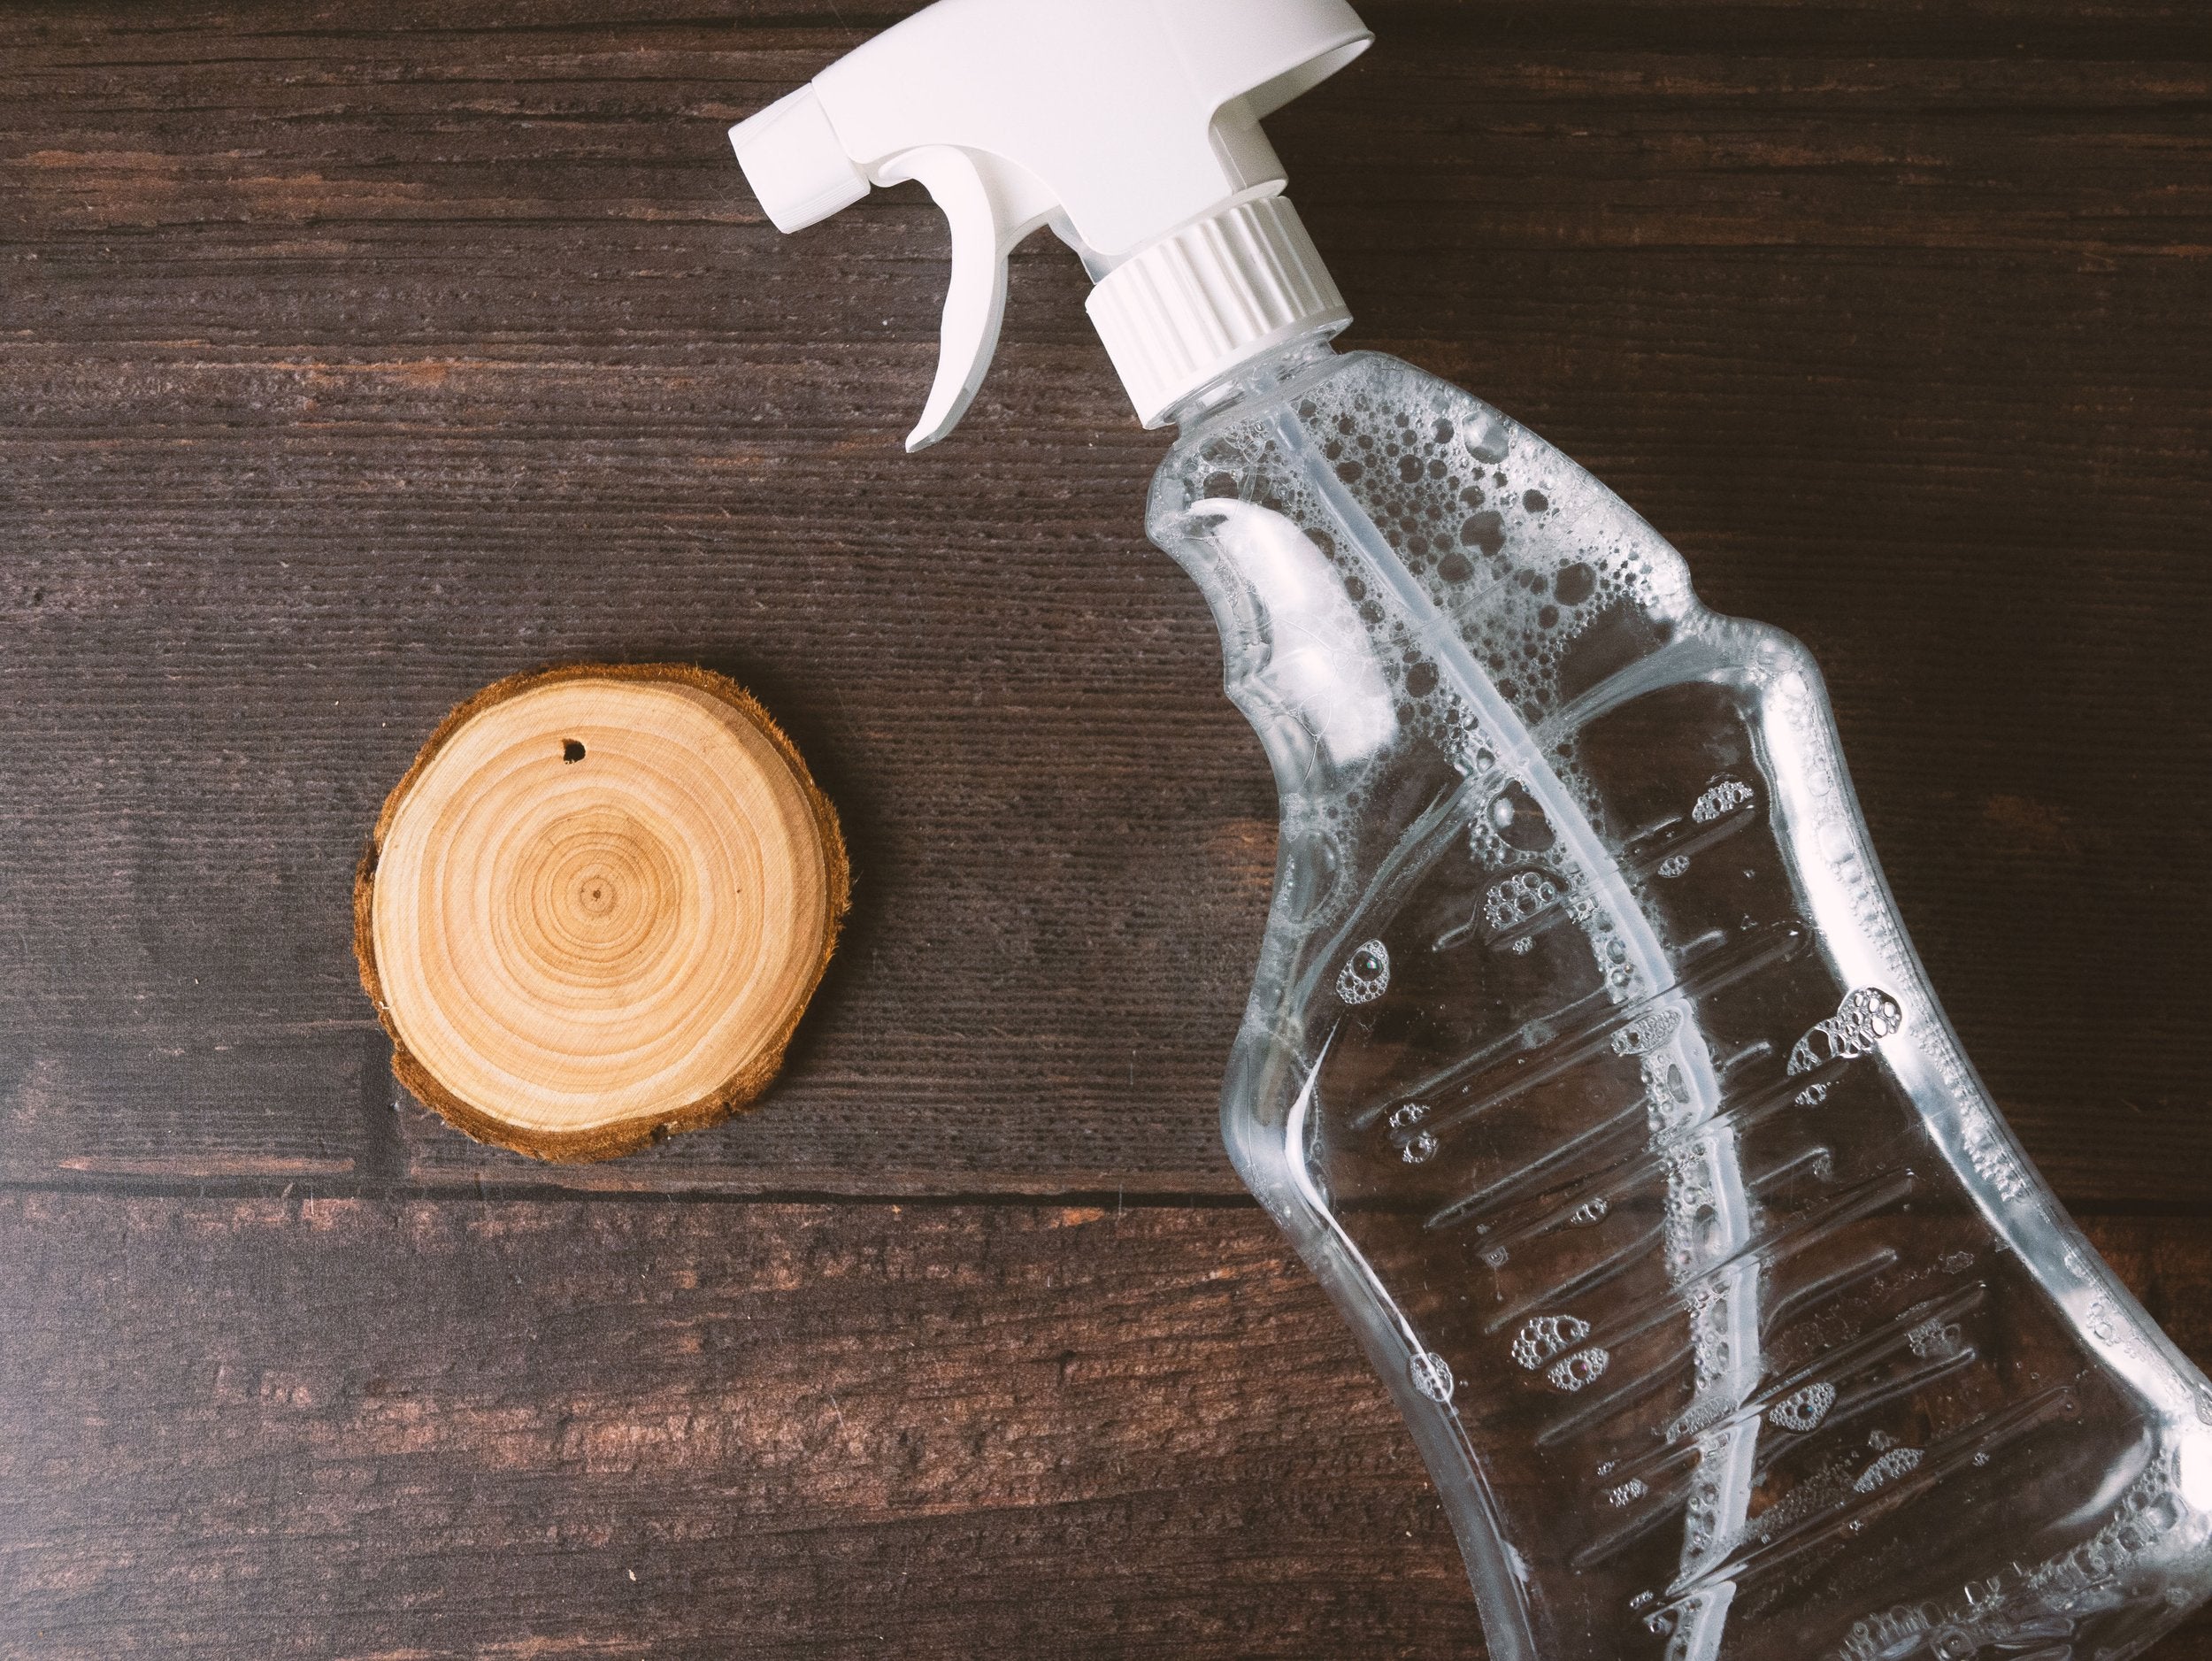
Spray water on the wood that you intend to brand. This will help manage the heat coming off your iron once applied and keep the areas that are meant to be unbranded clear, allowing the details to pop!
Check the iron is fully heated by testing it on some scrap wood. Branding should ideally take no more than 5 seconds and only requires light pressure. Try not to rock the iron back and forth too much while branding. Once you are happy with the result you can apply for the same duration to your workpiece to get similar results.
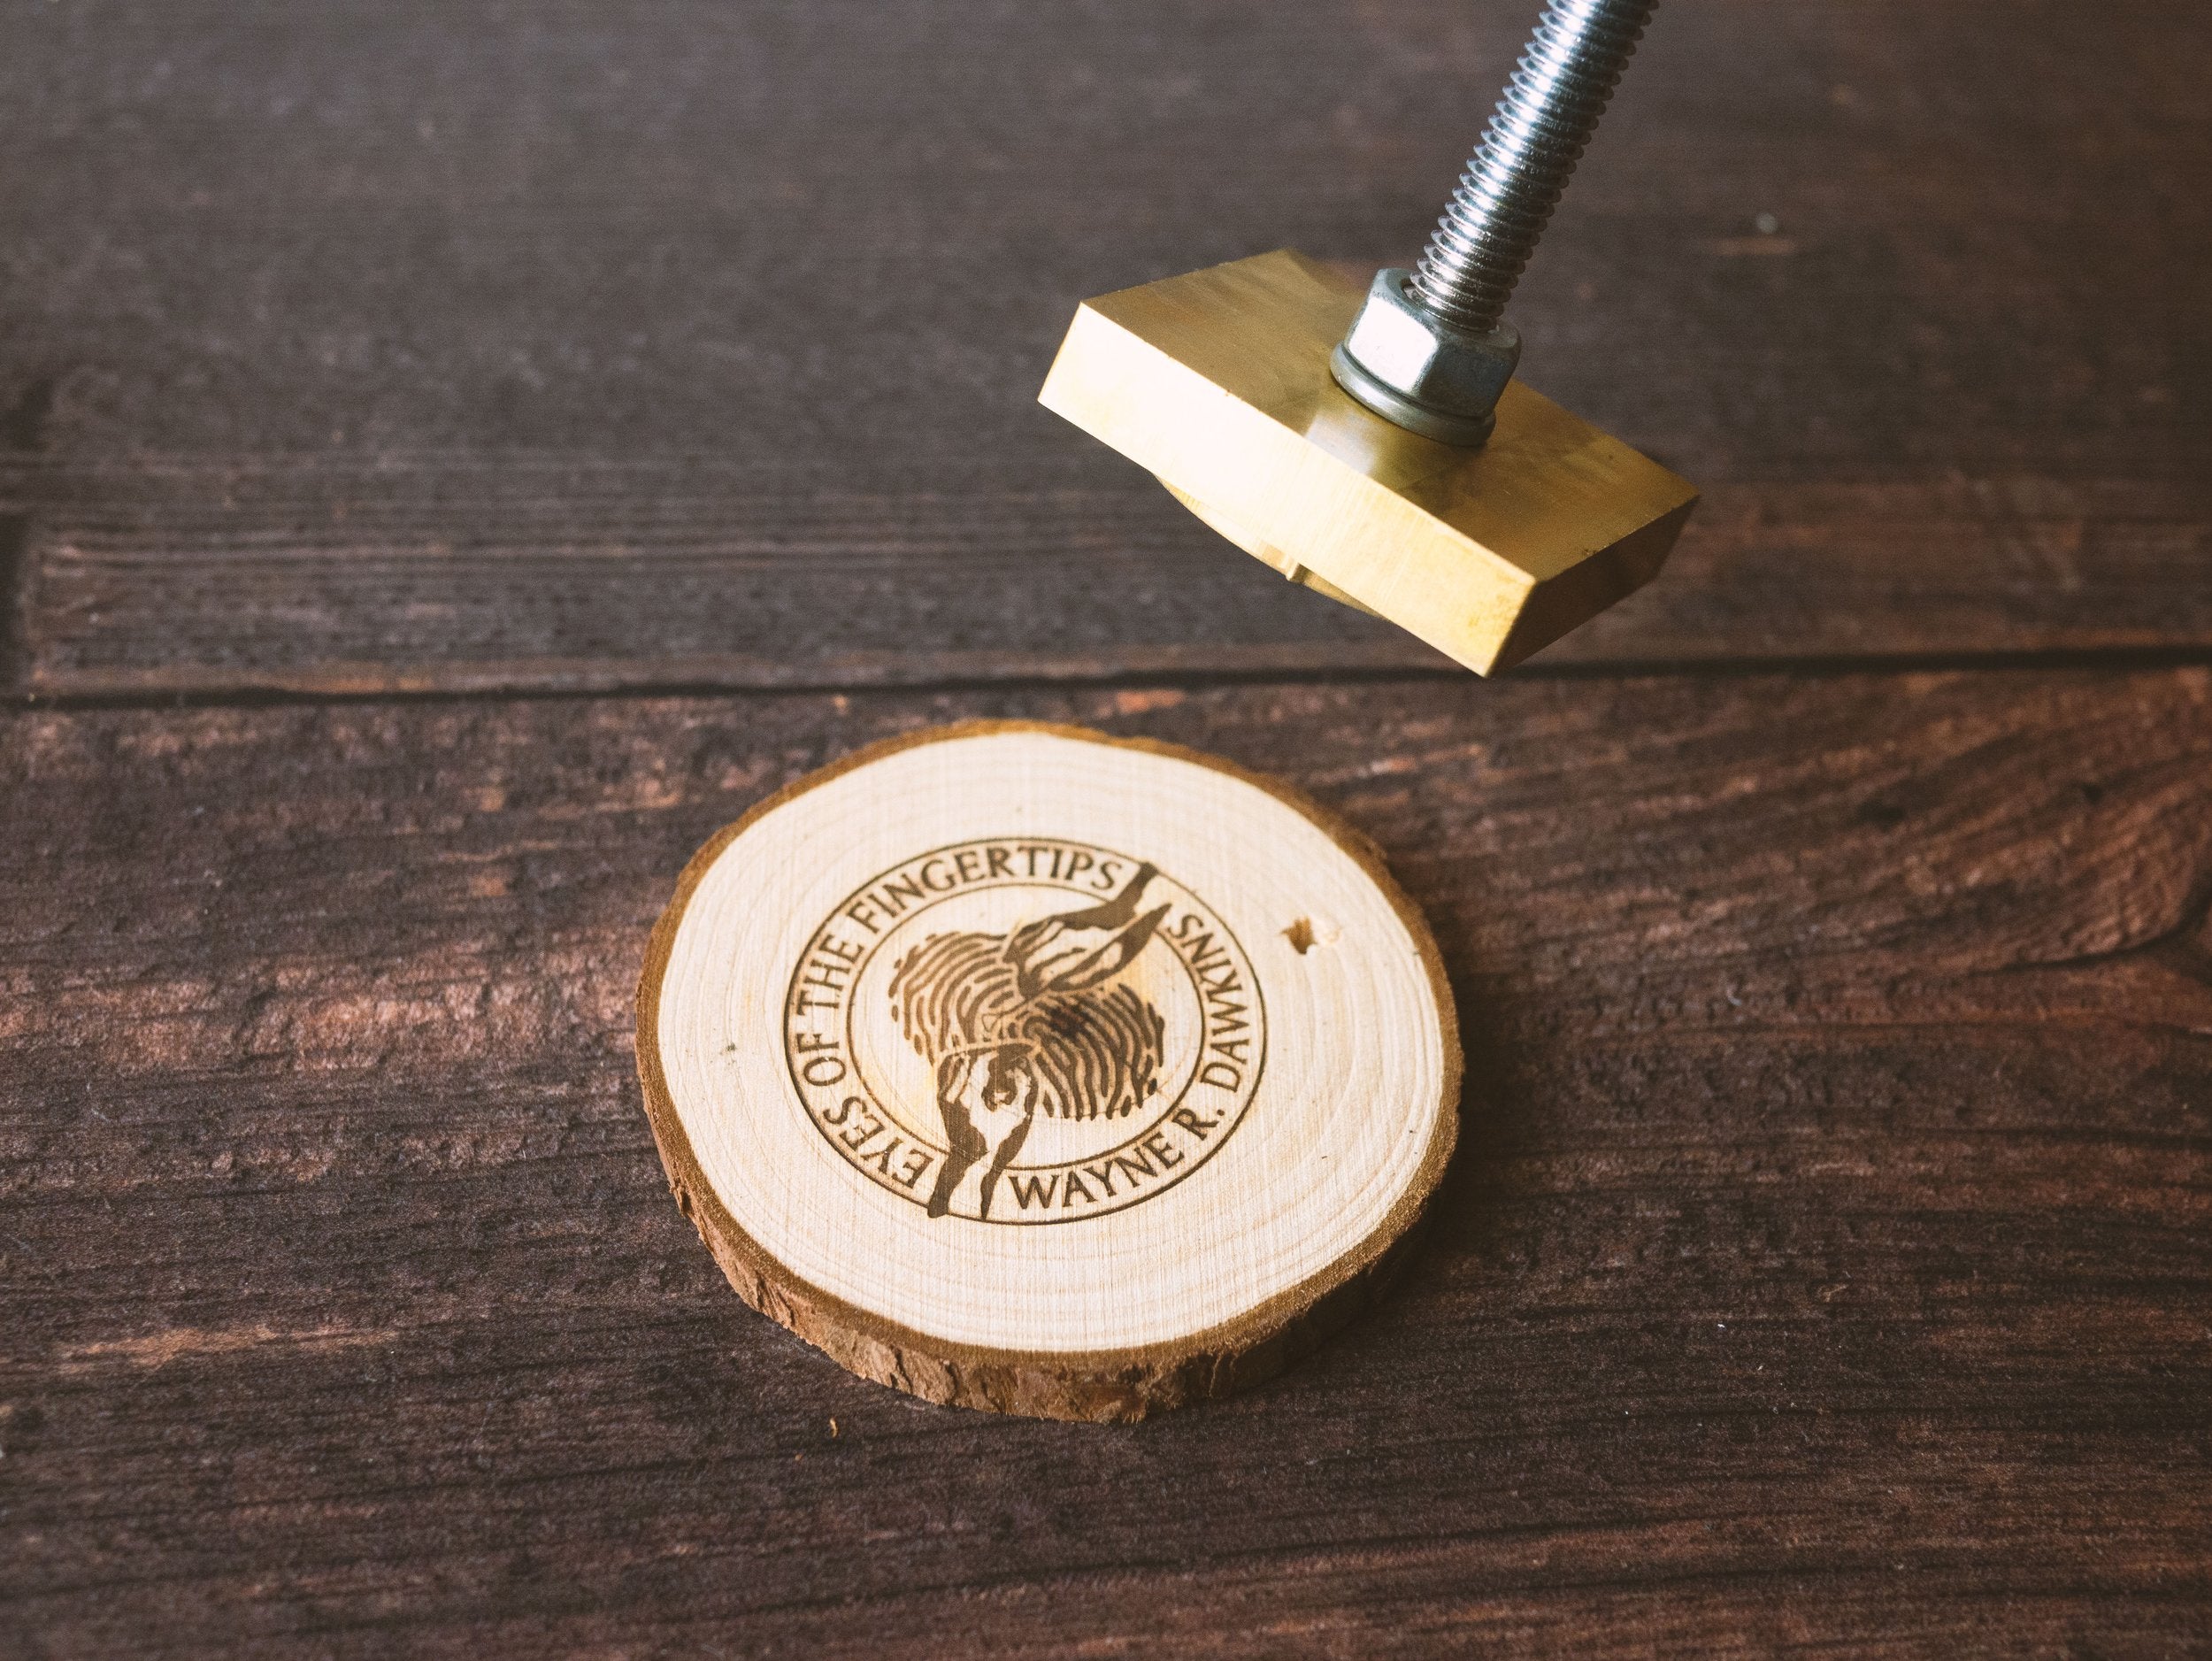
Check your result - a good brand will have a consistent finish with all details showing clearly. Your work can be sanded back to improve definition if desired.
Begin by ensuring the screw that secures the rod that screws into your iron is backed out sufficiently to allow the rod to enter the bore. Please note there is only one screw that secures this rod - the other must be left alone (the side with the washer on must be left alone).
Fold out the metal stand and place your electric heater on it.
Screw the metal rod into your iron with the spring washer in place. Fully tighten this by hand.
Fully insert the branding iron with the rod attached into the electric heater and tighten the single screw that secures this in place. Please be careful not to overtighten this.
Plug the electric heater in, turn on, and place on the stand. Heating times will vary between 5 and 20 minutes depending on the size of your iron. Please note that new electric heaters will burn off manufacturing oils for the first 20-30 minutes of use, so ensure the first use is in a well ventilated area.
Spray water on the wood that you intend to brand. This will help manage the heat coming off your iron once applied and keep the areas that are meant to be unbranded clear, allowing the details to pop!
Check the iron is fully heated by testing it on some scrap wood. Branding should ideally take no more than 5 seconds and only requires light pressure. Try not to rock the iron back and forth too much while branding. Once you are happy with the result you can apply for the same duration to your workpiece to get similar results.
Check your result - a good brand will have a consistent finish with all details showing clearly. Your work can be sanded back to improve definition if desired.